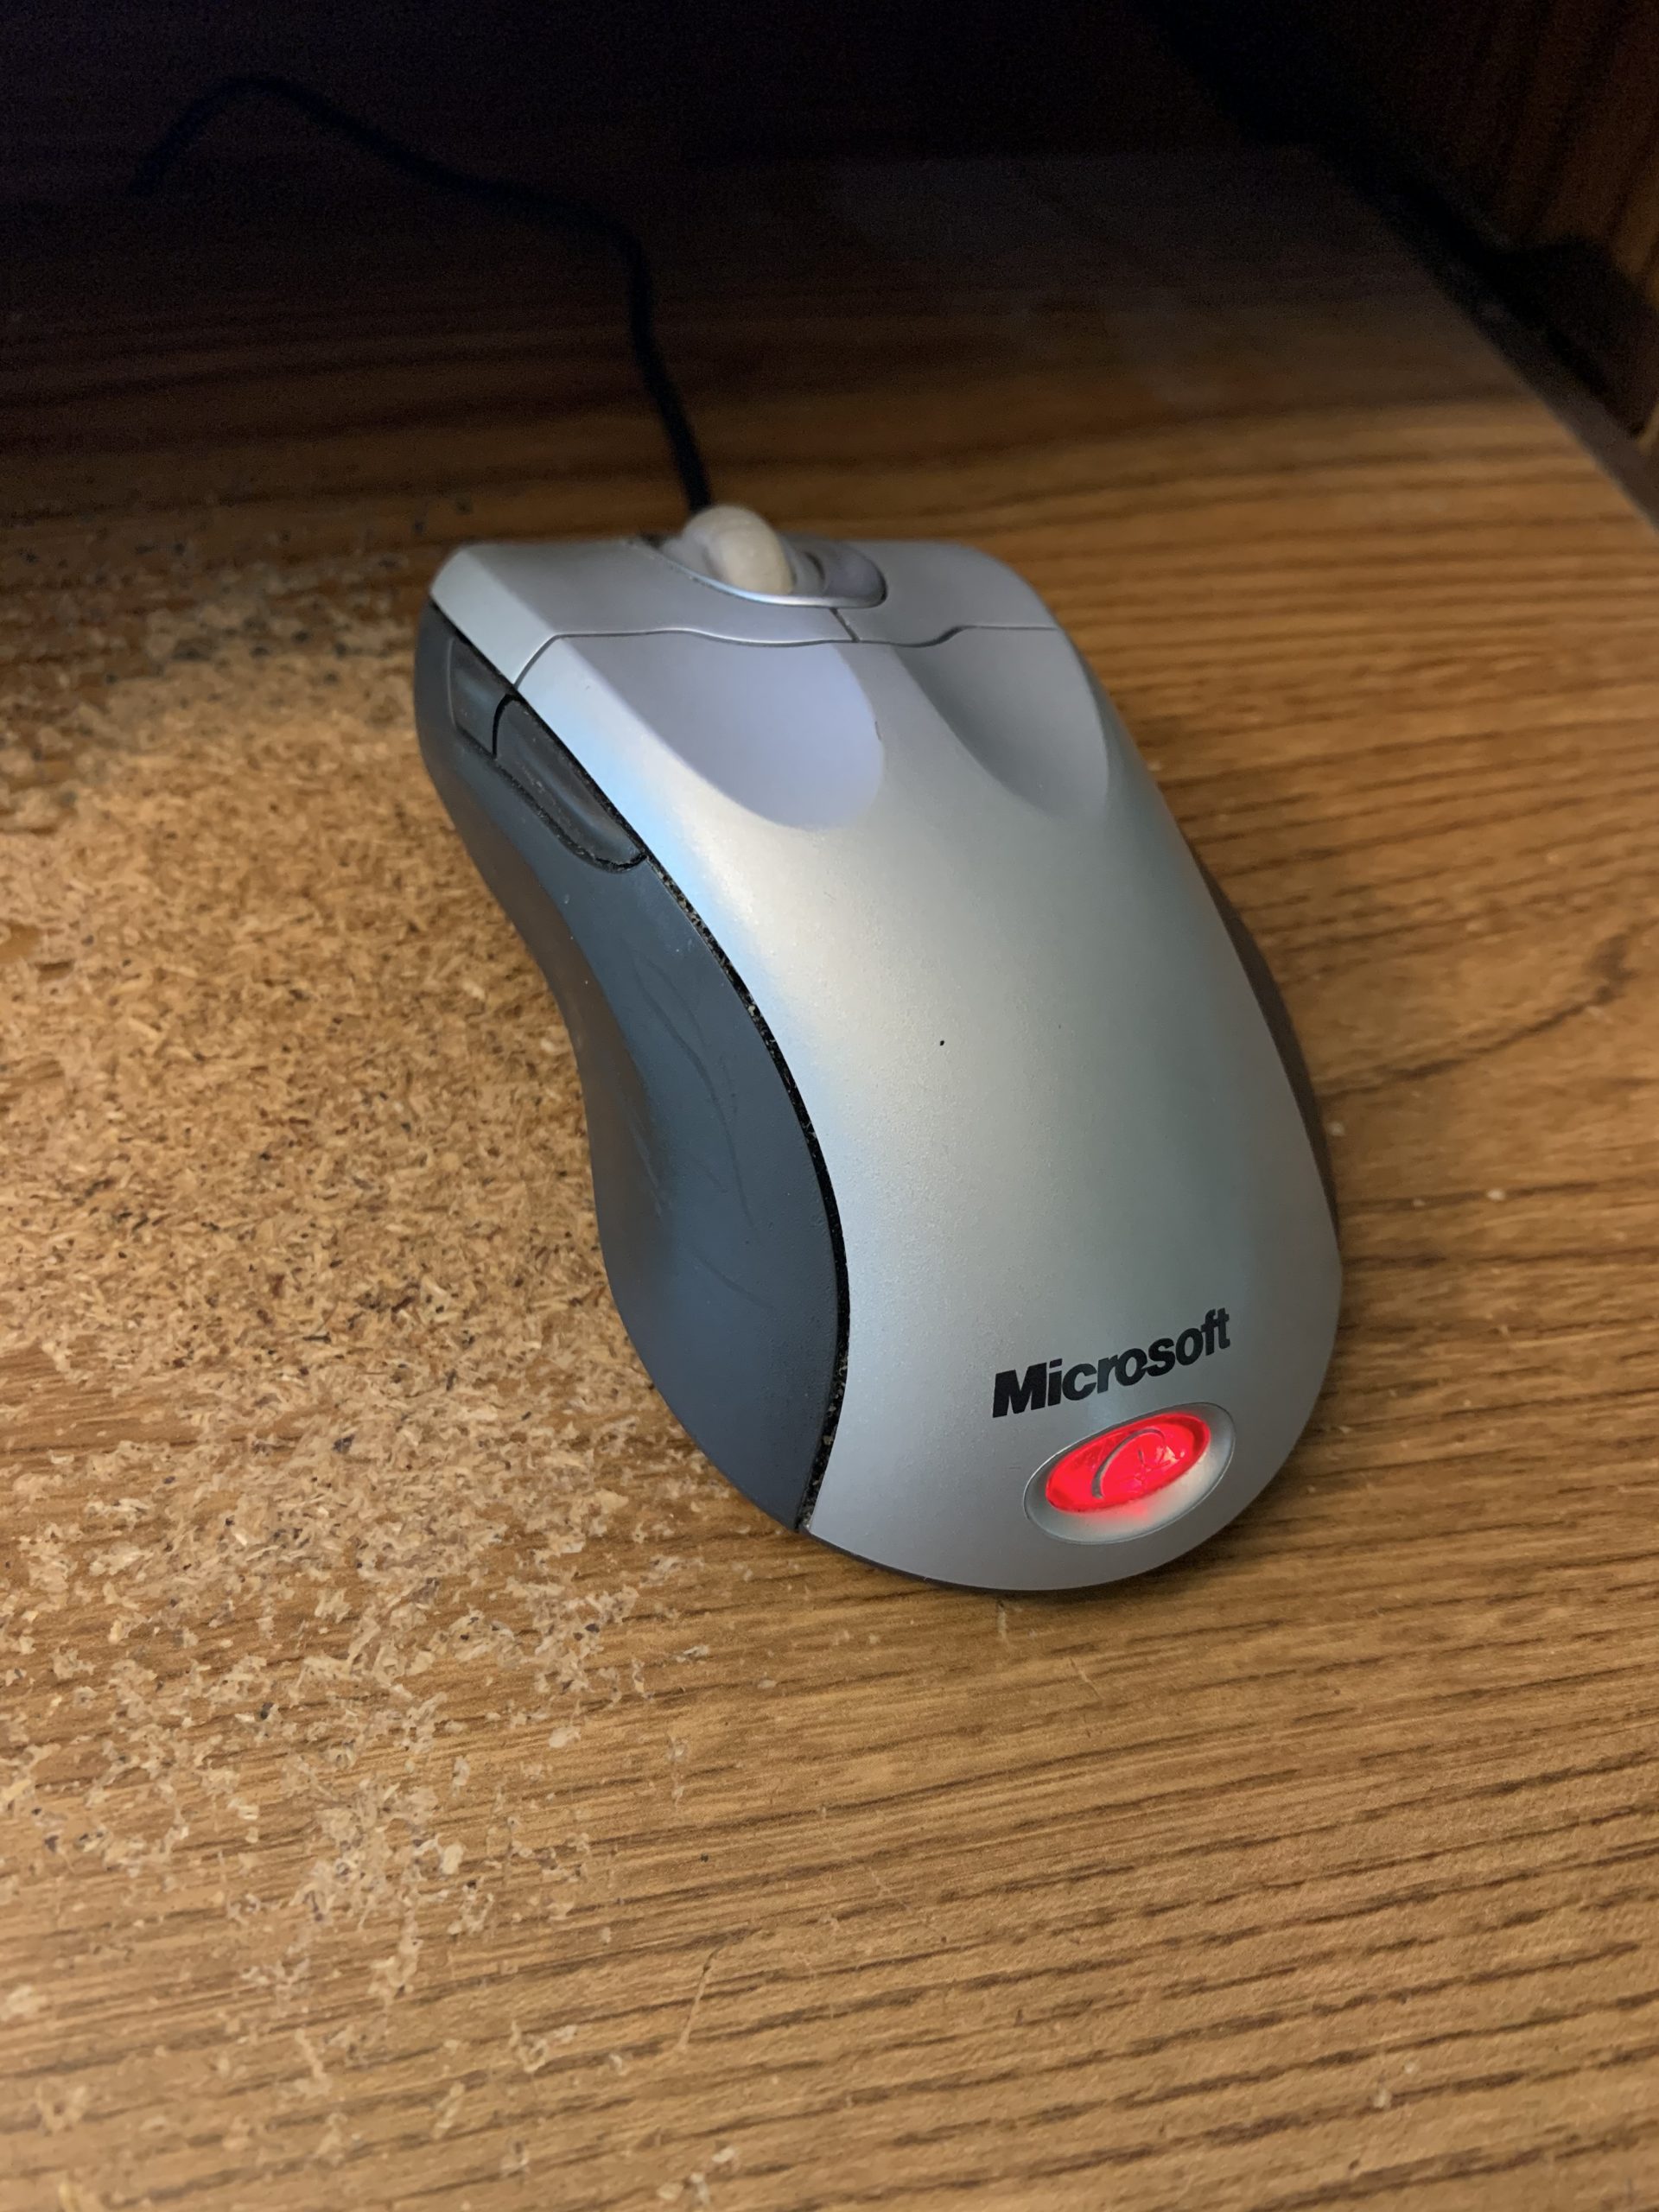
My favorite mouse is my Microsoft IntelliMouse Explorer 4.0. I bought my first one back in 2009. I love how the scroll wheel smoothly spins. I’ve never had another mouse like it. I want to keep using it forever and ever.
After about 9 years, the left mouse button started acting intermittently. Sometimes when I clicked the button, it wouldn’t register the press. Or while dragging, it would act like I had released the button even though I hadn’t.
I discovered a really interesting YouTube video where user “blimeyolriley” tracked down the issue and shared his clever workaround. The problem is that the left button’s tactile switch (which is soldered onto the circuit board) had started to wear out. The workaround is to steal the tactile switch from another button that you don’t use, and swap them around. The side buttons on this mouse are easy to accidentally click. I don’t use them, so they are a perfect candidate. If you don’t want to ruin your side buttons, I recently discovered that the tactile switch being used is the Panasonic EVQ-P0E07K (or something similar like the EVQ-P0D07K, which is the same part with a higher operating force for pressing the button and a shorter mechanical life). The EVQ-P0E07K worked fine as a drop-in replacement for me.
The video doesn’t go through the process of disassembling the mouse. It focuses more on the desoldering/soldering part of the process. The actual act of taking the mouse apart is a little tricky. When I tried to do it myself a couple of years ago, I screwed something up when I took it apart. I could never get the mouse to go back together properly. The scroll wheel would get stuck clicked down sometimes. So I simply bought a used mouse on eBay and got rid of my old broken mouse.
Fast forward 2 years, and my replacement mouse started doing the same thing. So I gave the repair process another shot, and took lots of pictures as I tore it apart. I thought I’d share everything here in case someone else has to go through it.
The first step is easy. The two bottom feet actually have screws beneath them. Simply peel them off (I used a small flat blade screwdriver to pry them off). Set them somewhere sticky side up so you can stick them back onto the mouse when you’re all done. Then remove the screws.
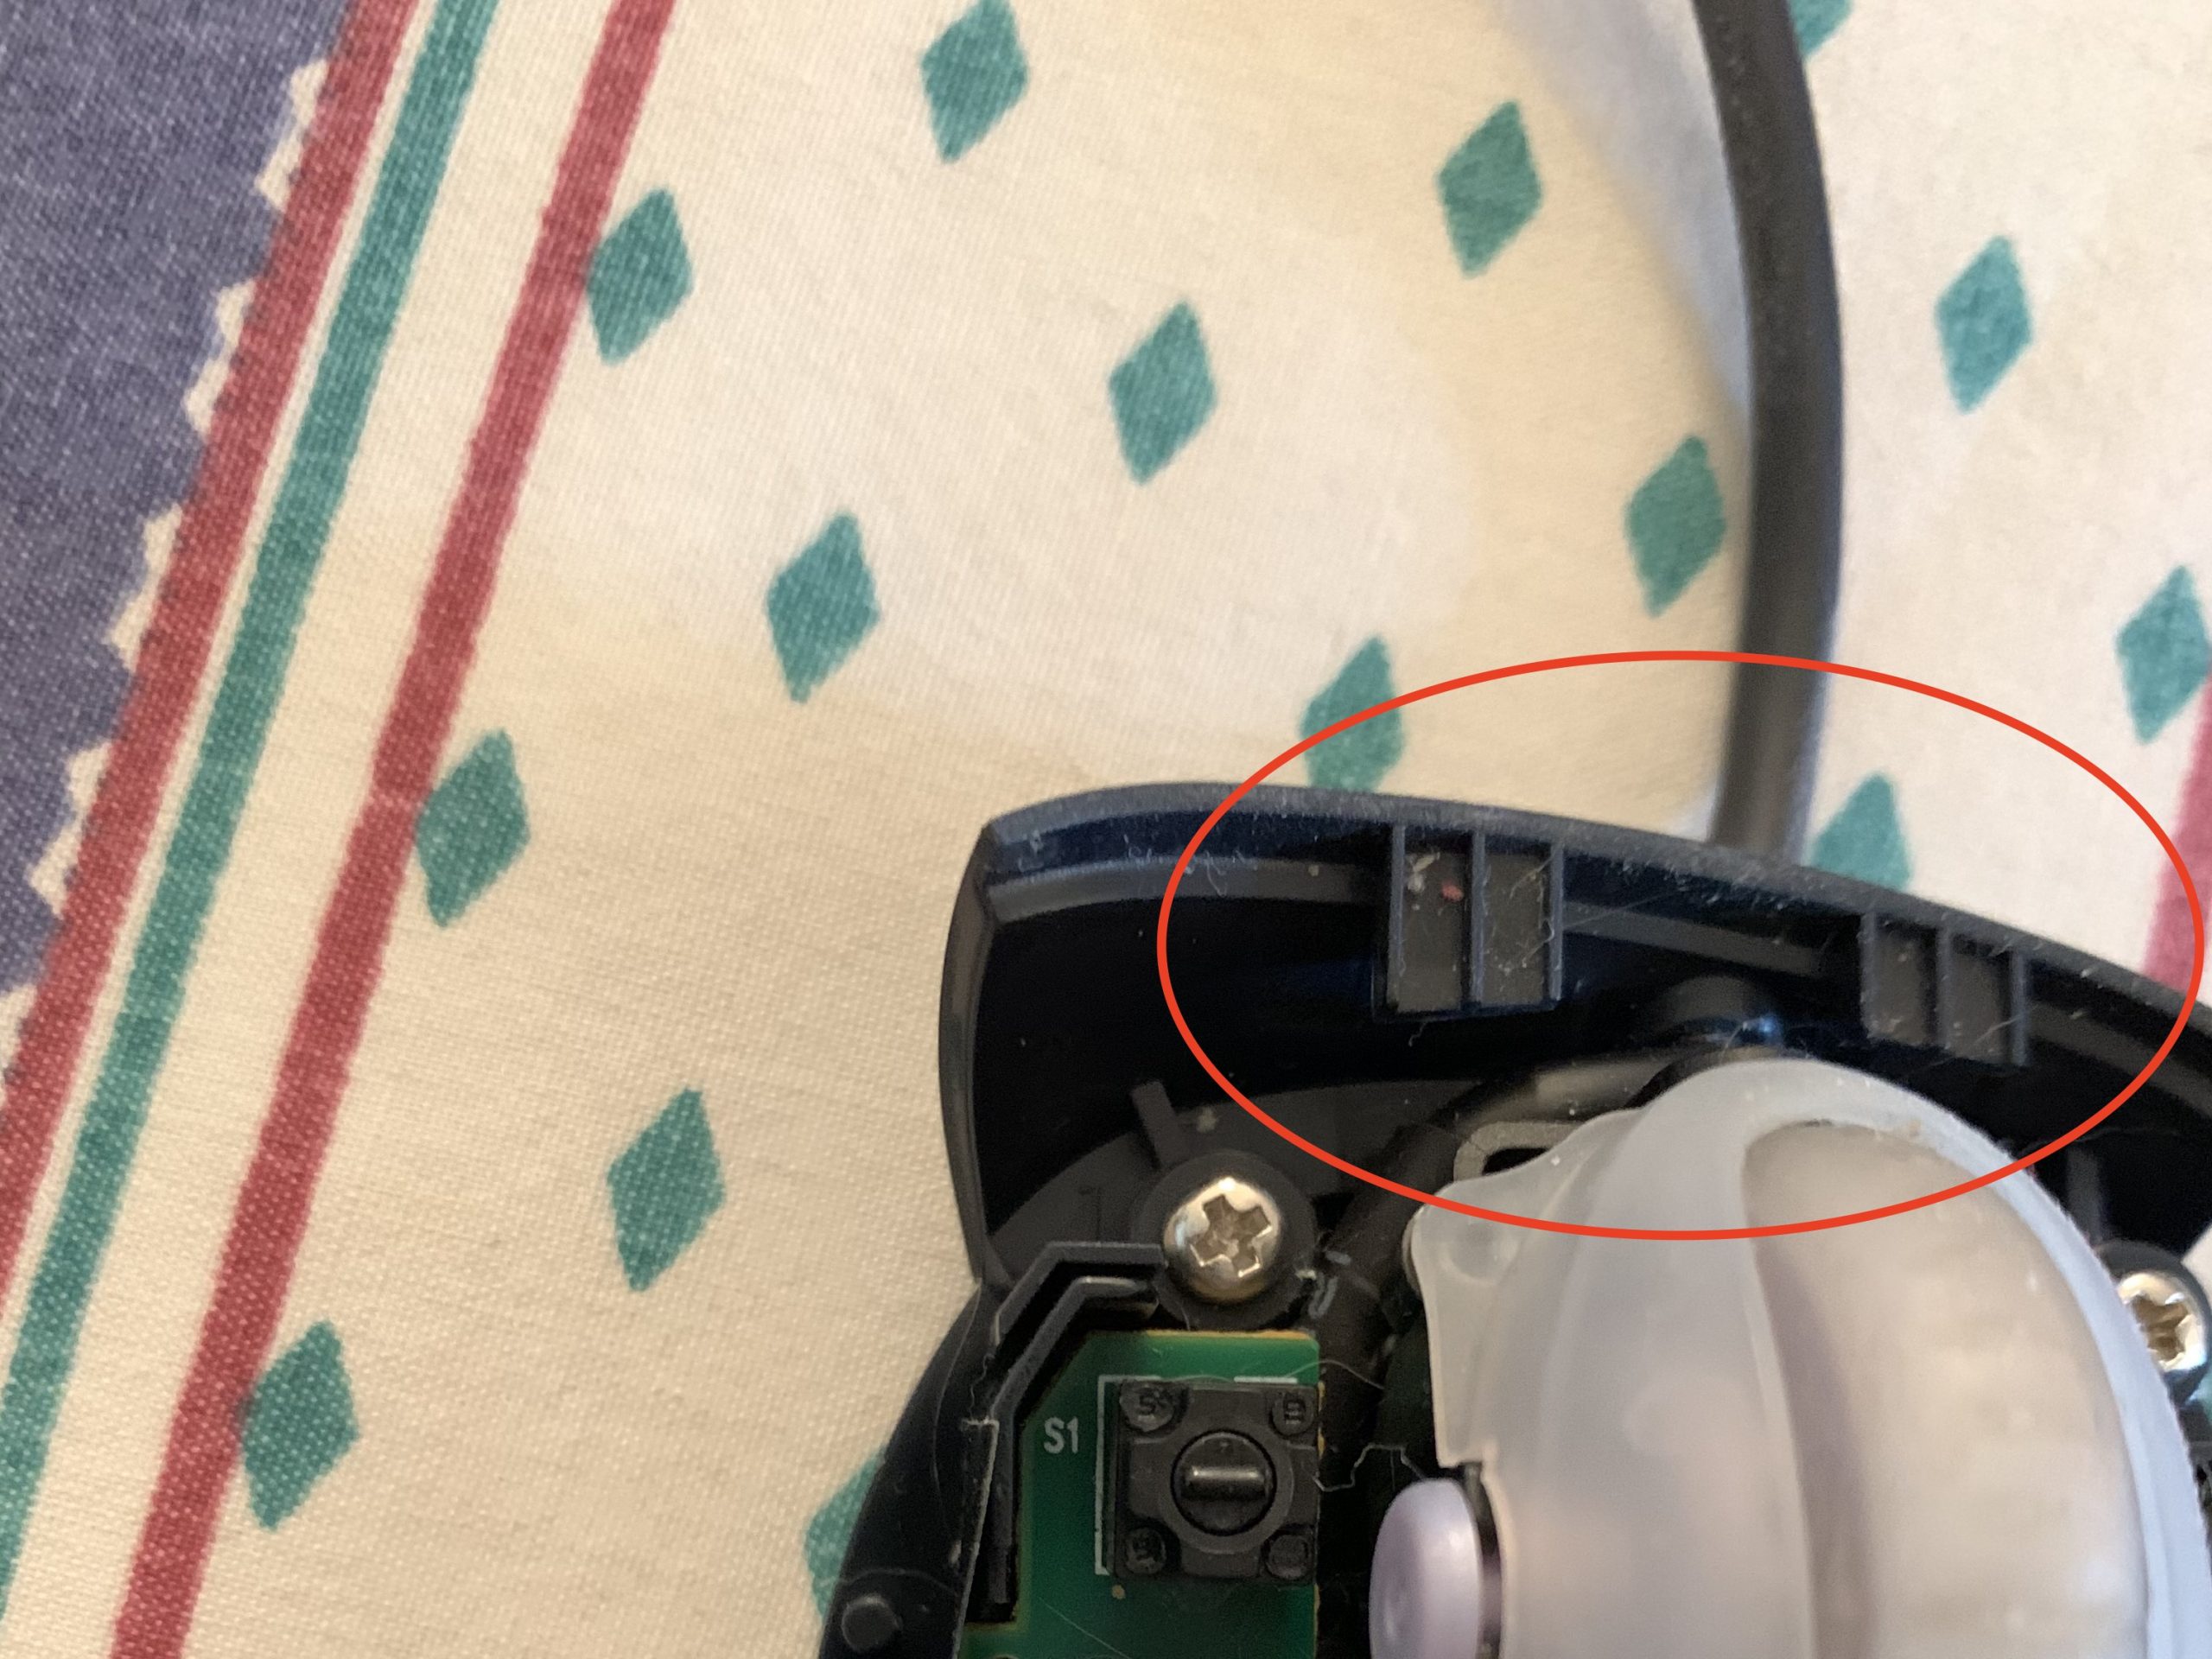
With these screws removed, the two halves of the mouse should separate a bit. The other end of the mouse is held together by a couple of large “clips”. I’m not sure I have a better word for them. See below for a better view of what’s going on. Make sure not to break them. I found it easier to peel the side away a bit first:
Here is what it looks like underneath after the top shell comes off:
Here is a better view of the “clips” I am talking about. There are holes in the outer shell that hook into the protrusions circled in red in the picture below. This is where you will start to see some of the filth that had made its way inside of my mouse. This is a great opportunity to clean everything up.
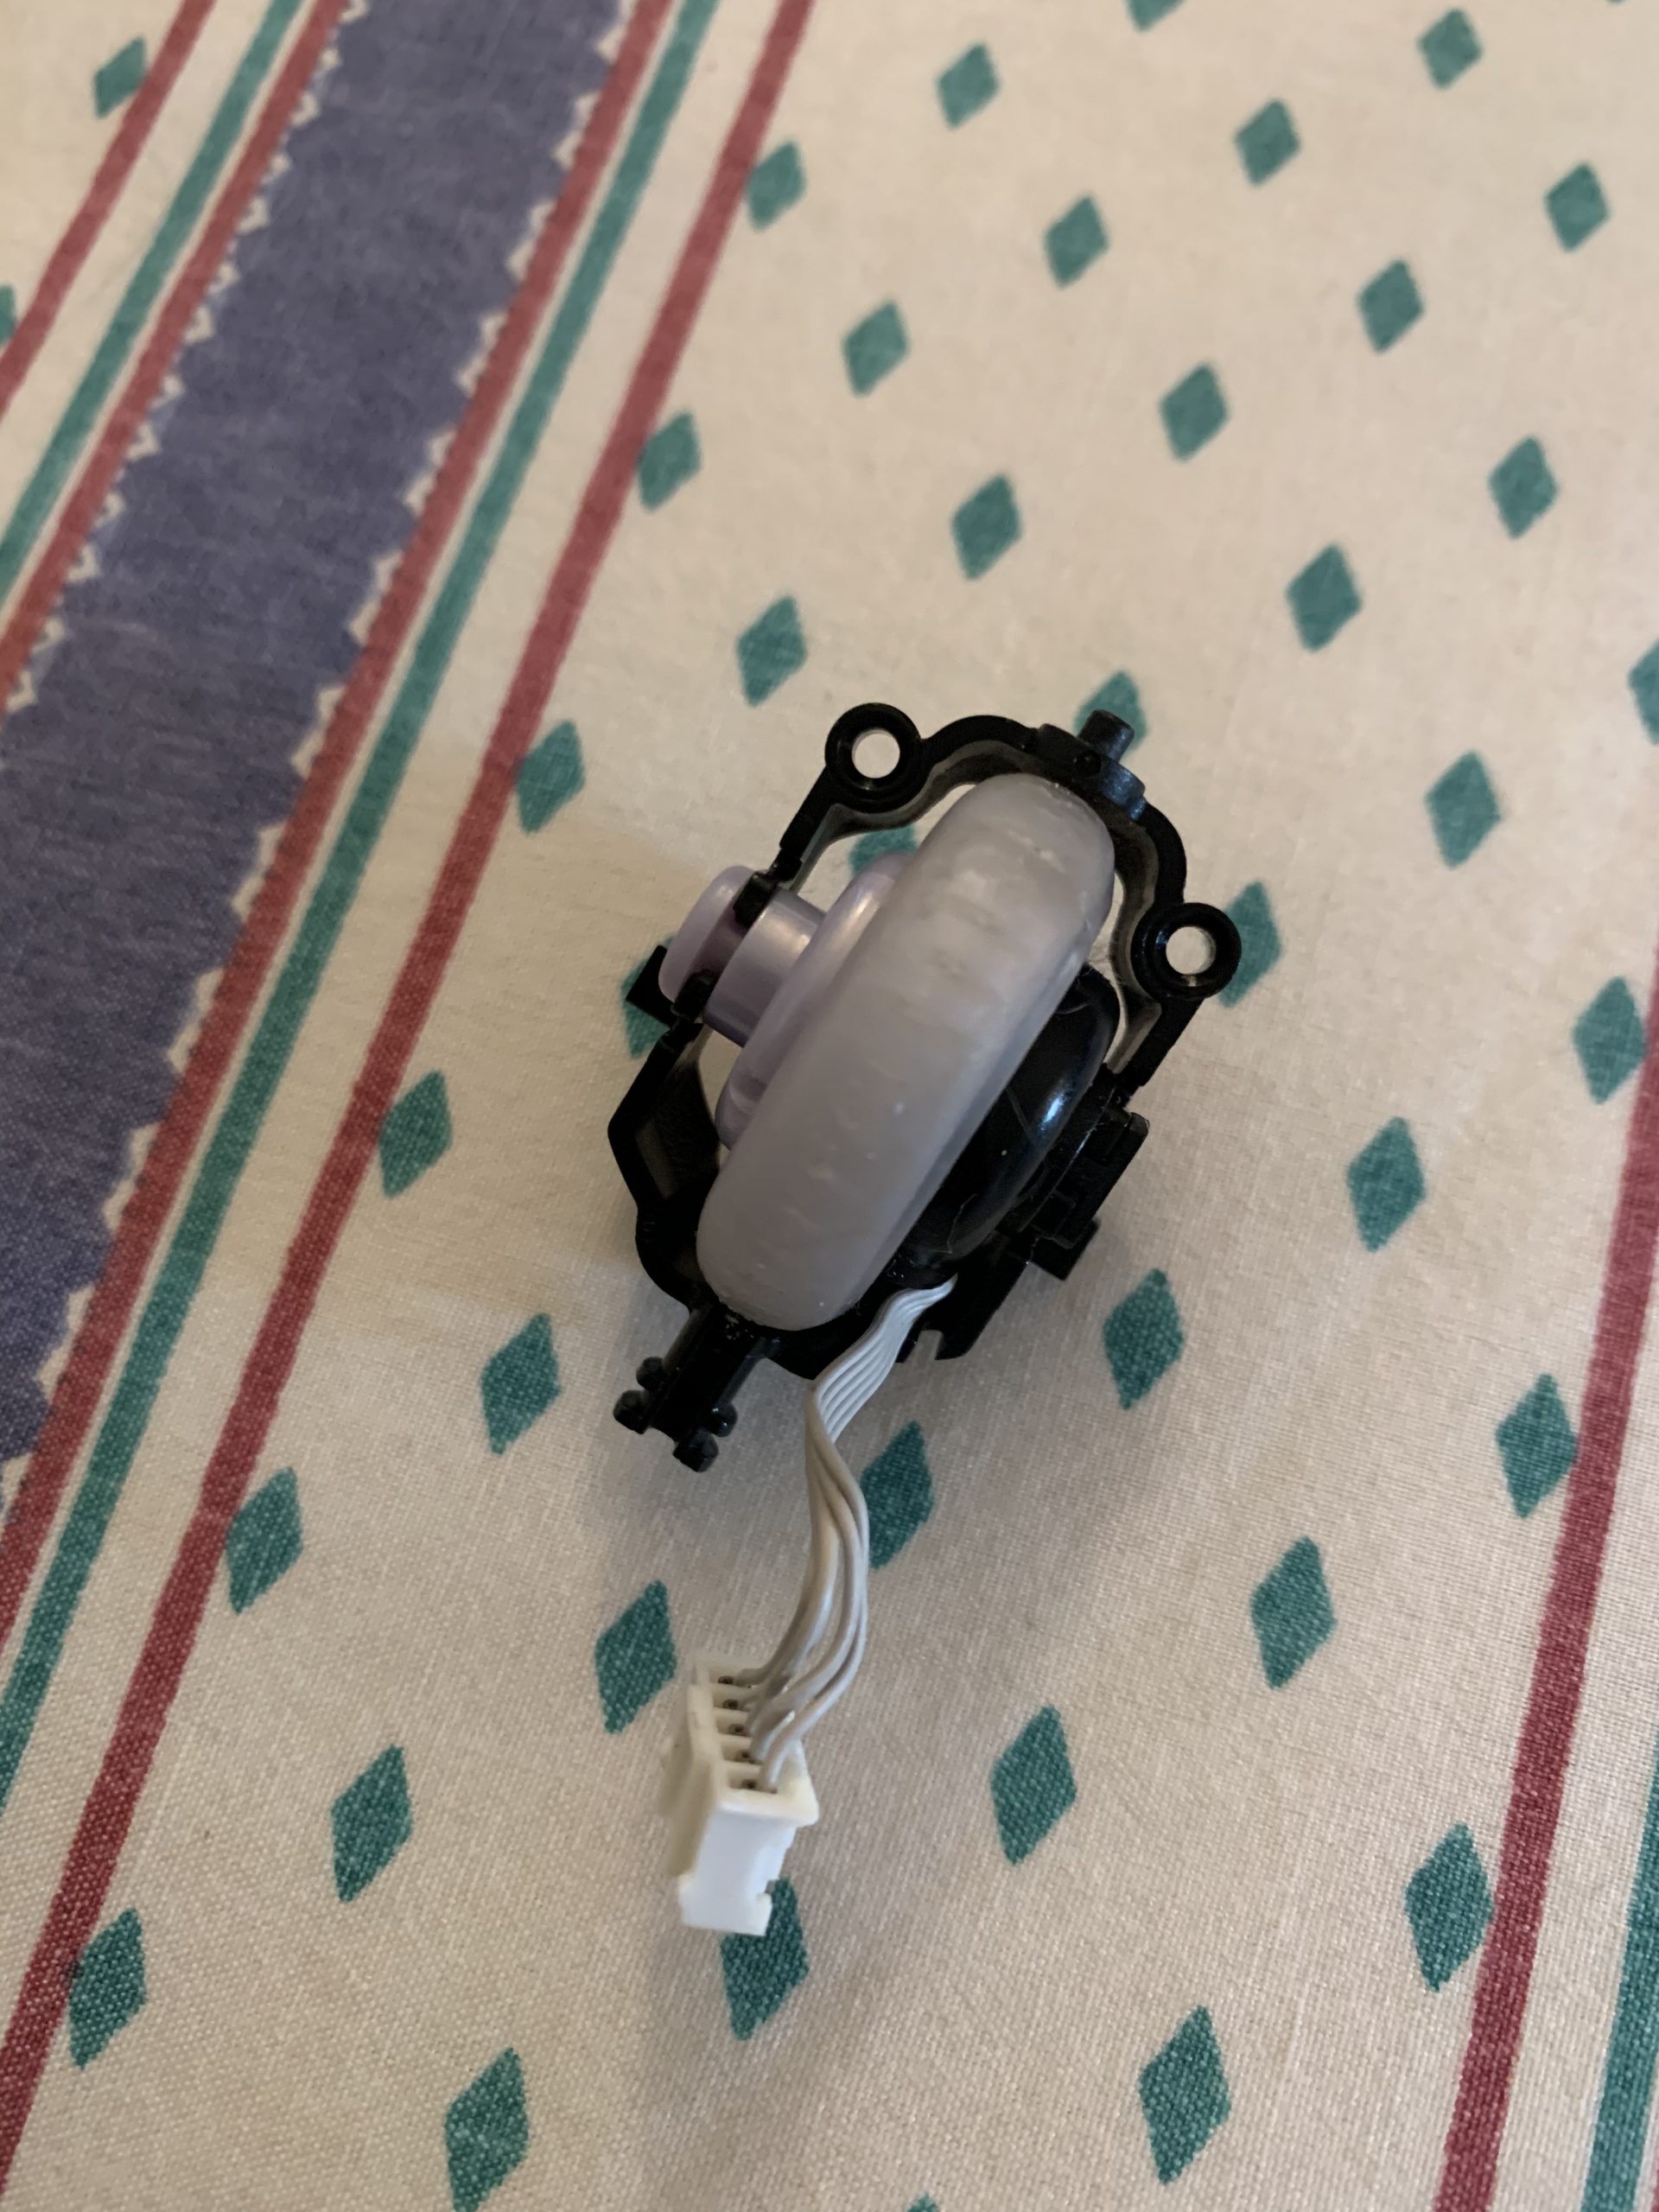
Remove the little cover from the mouse wheel. On mine, it lifted right off, uncovering more dirt and grime:
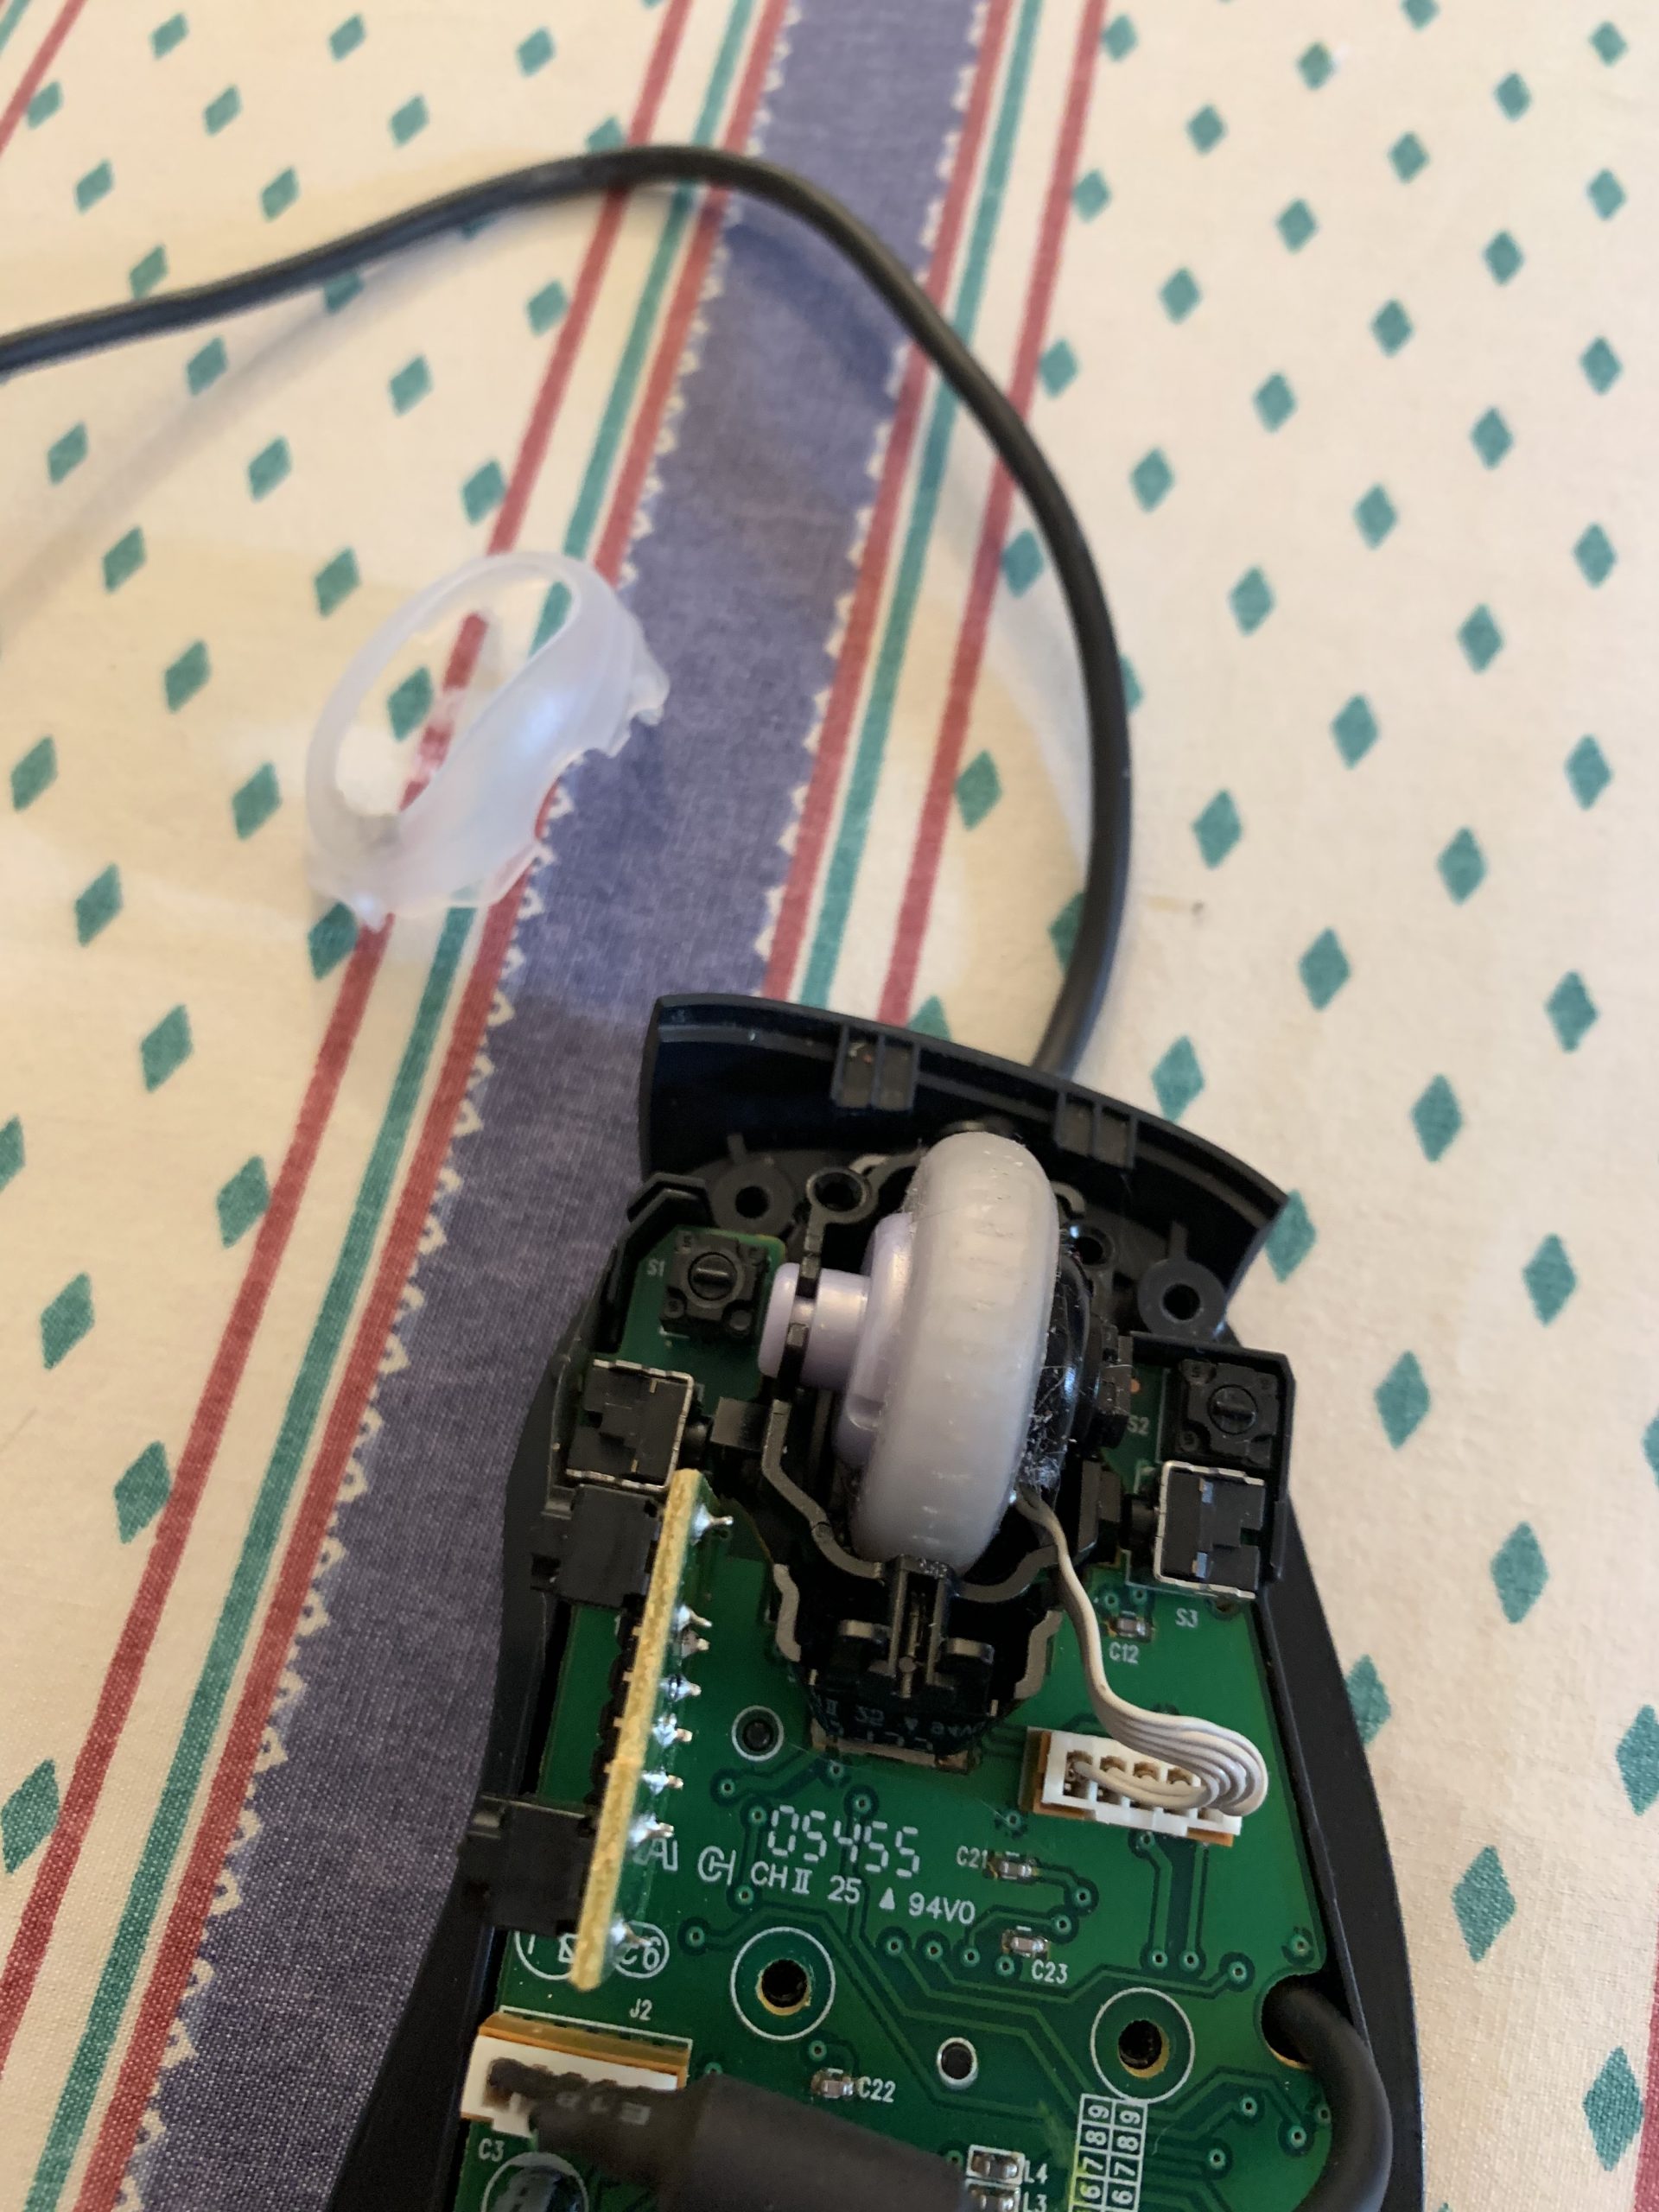
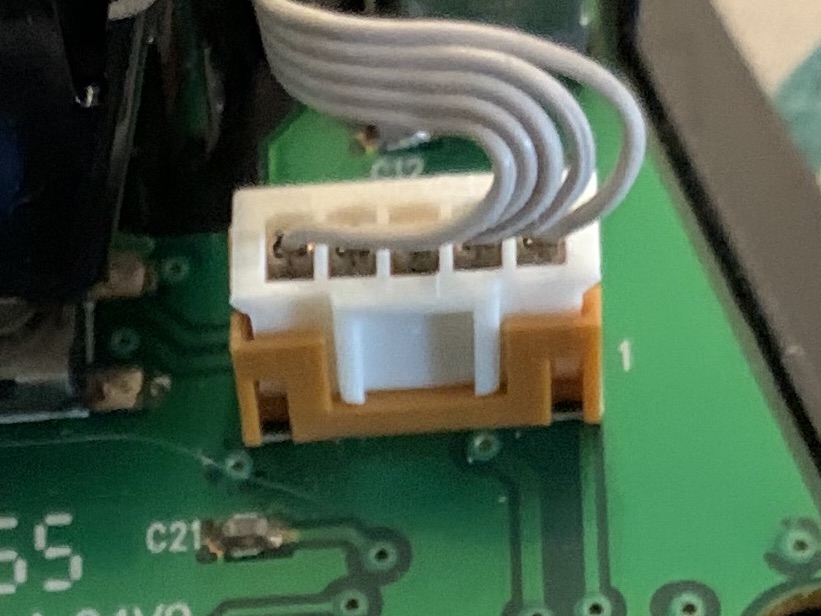
Unplug the cable going from the wheel to the circuit board. It’s kind of difficult to pull out. It might help to pry the connector up with a small screwdriver. Whatever you do, don’t pull up on the wires. You could accidentally pull out one of the pins.
I removed the scroll wheel next. I don’t think you have to do this, because on the YouTube video the scroll wheel was still in place. This was definitely the most difficult part for me. It made it easier to find space to get the circuit board out though, and gave me more room to clean things out, so it was worth it. On the end closest to the top of the mouse, there is a little peg that goes into a hole that holds it in place. On the end closest to the bottom of the mouse, the tilt wheel is snapped into a hole that allows it to rotate sideways. I popped the peg out first, and then rotated the wheel and it pulled out of the hole it was snapped into. Be careful during this part. You really don’t want to break or damage anything. Here is what everything looks like after it’s removed:
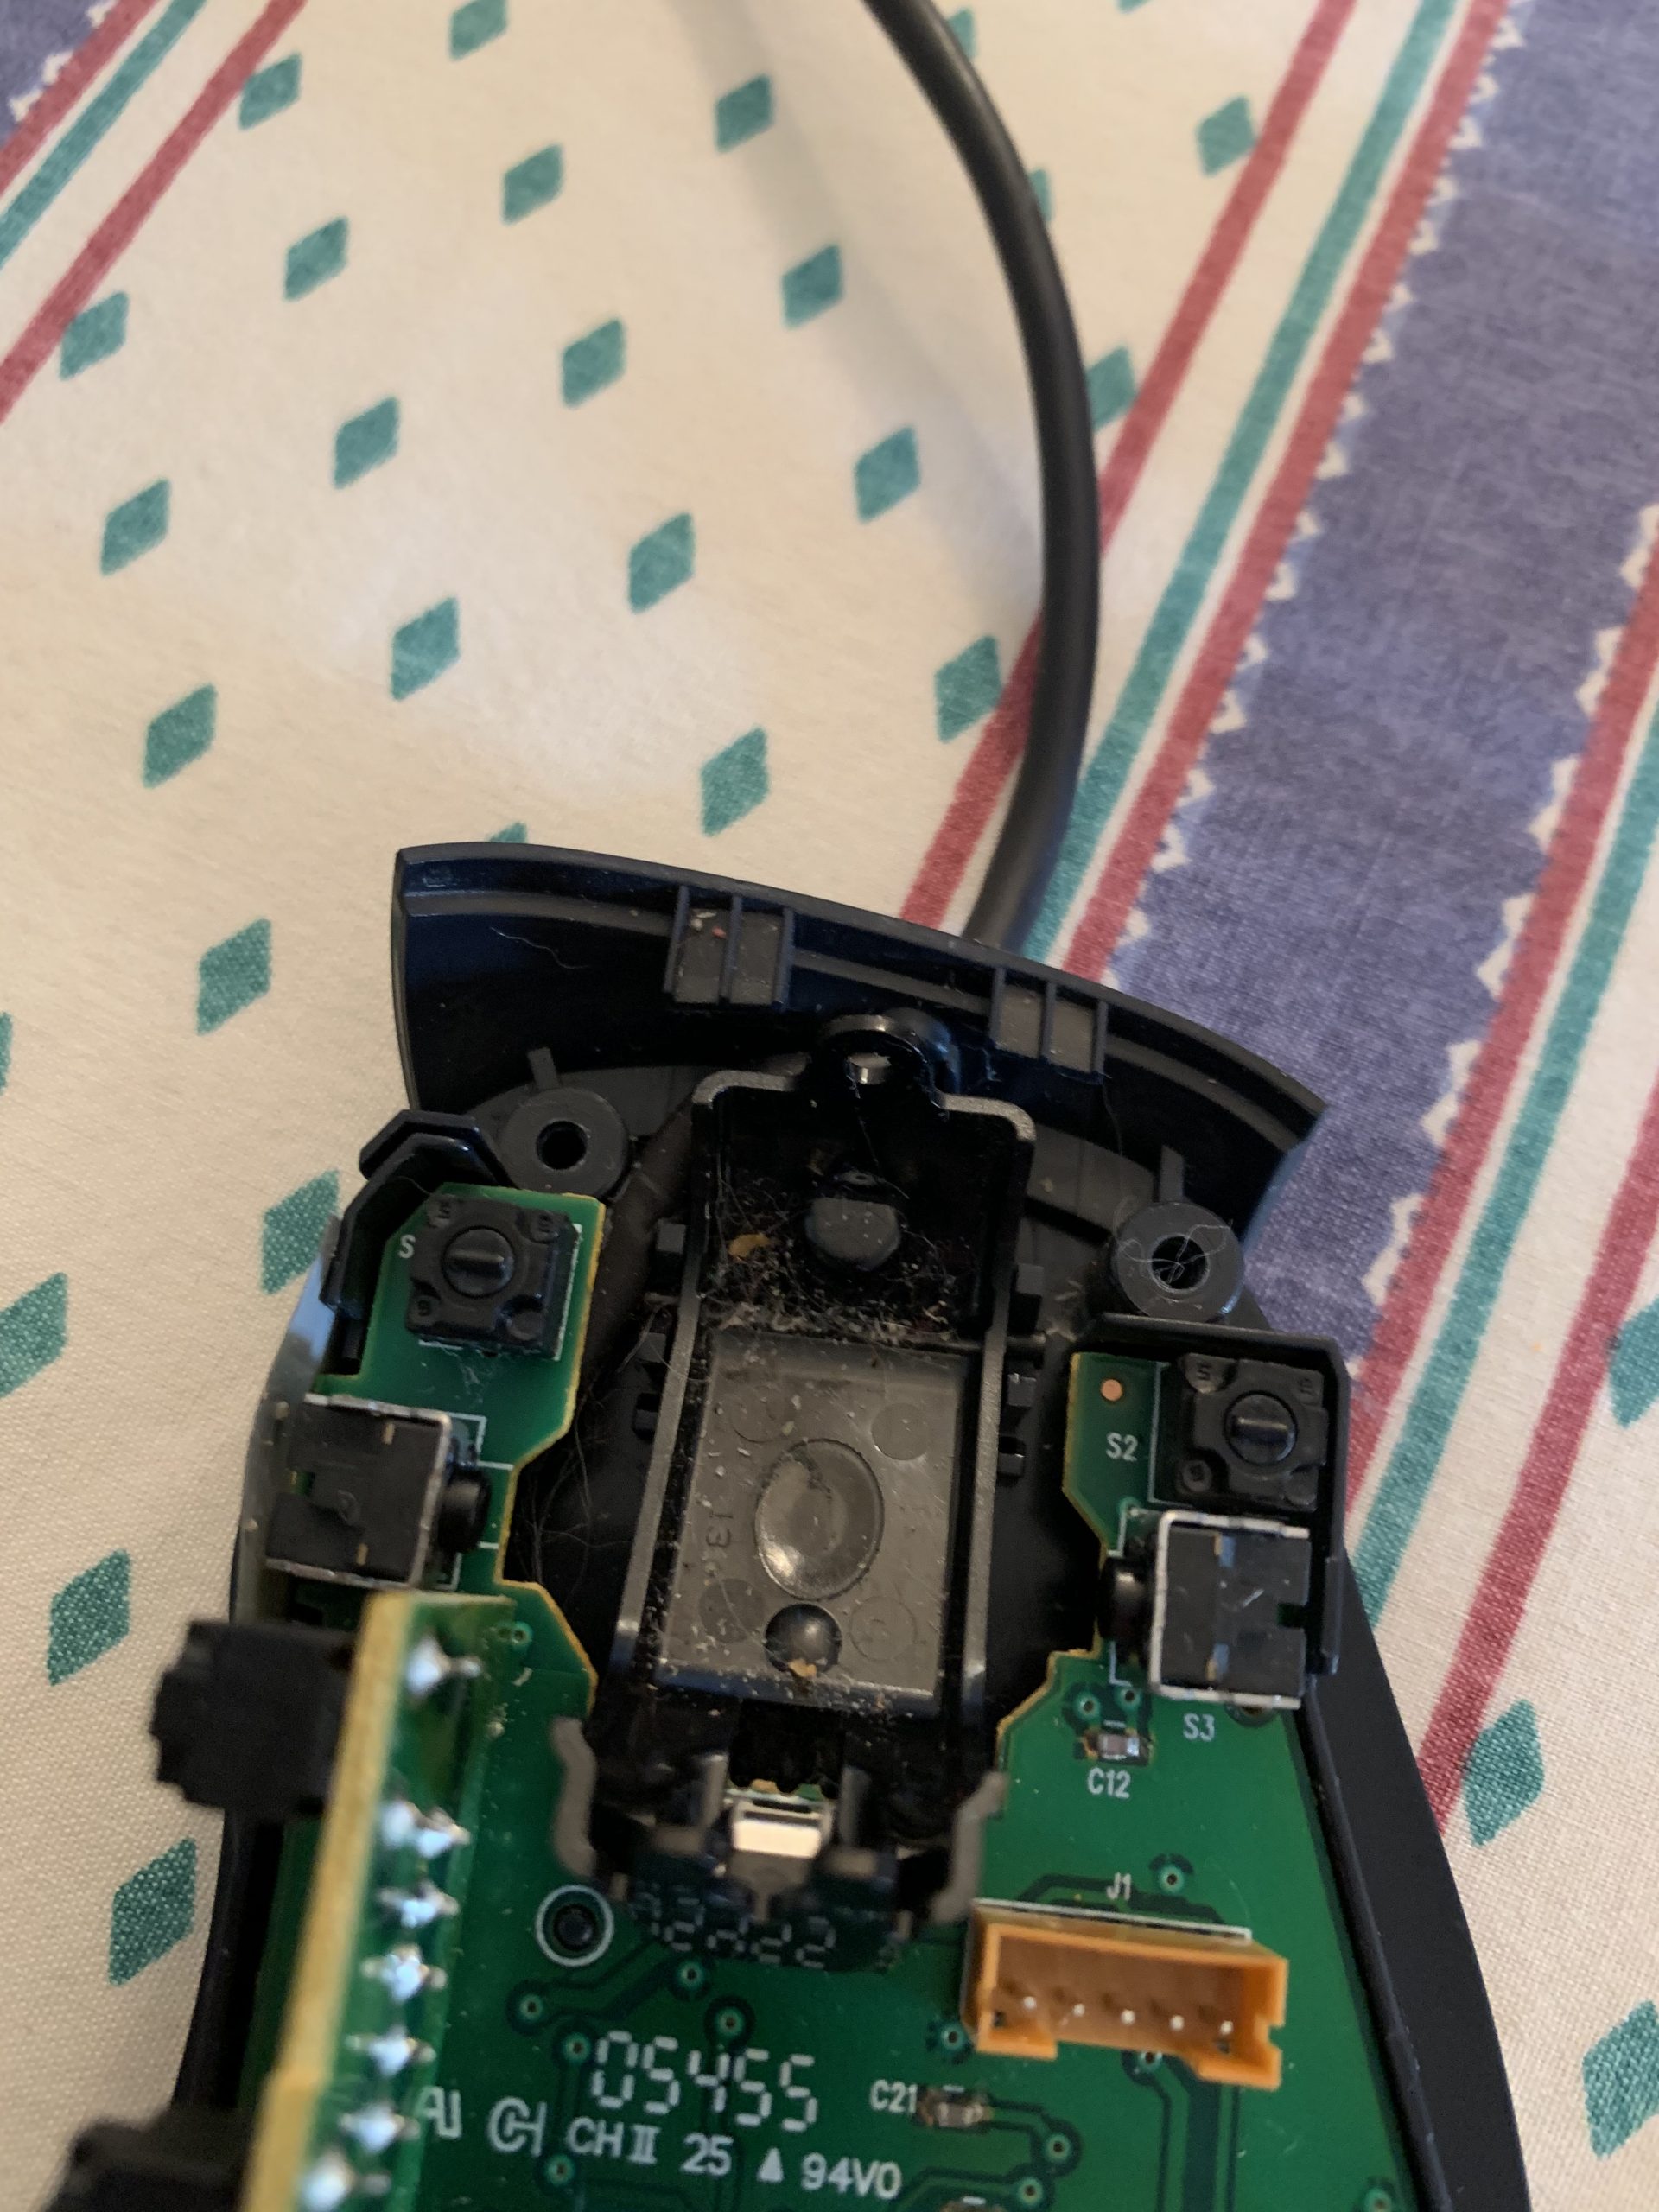
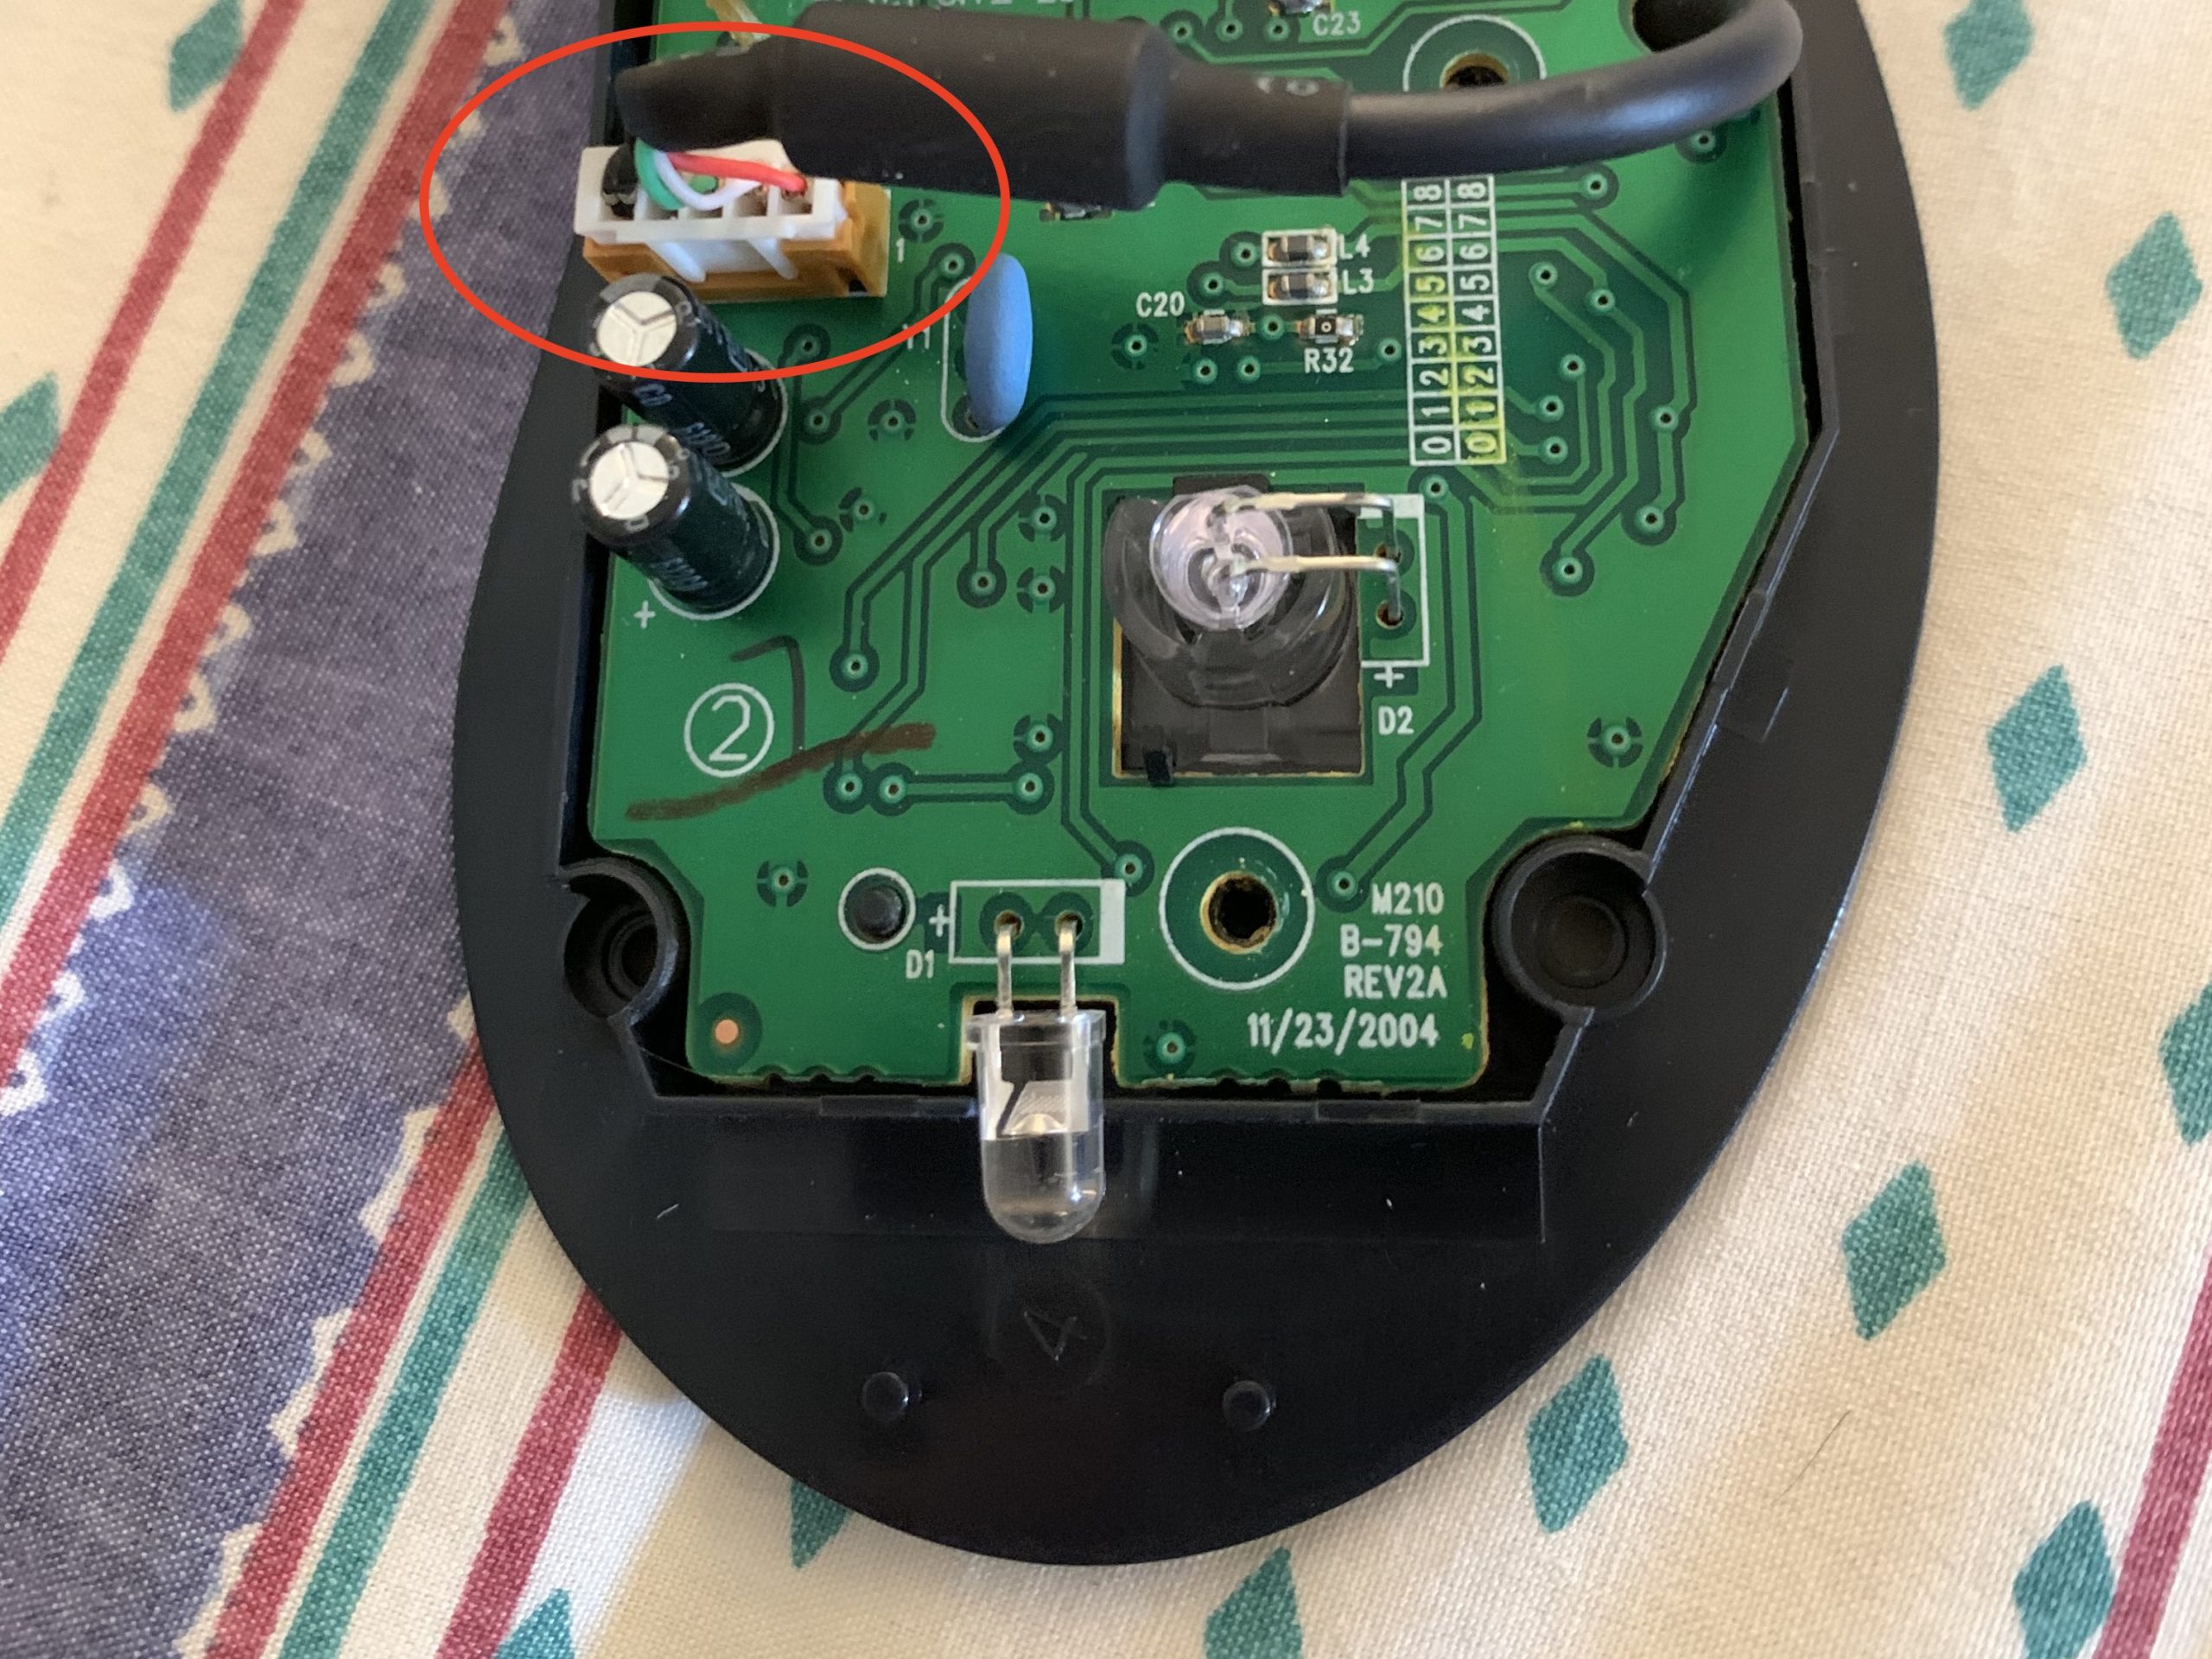
Definitely take advantage of this time to do some cleaning inside! Now, unplug the other cable going to the board, which is the USB cable.
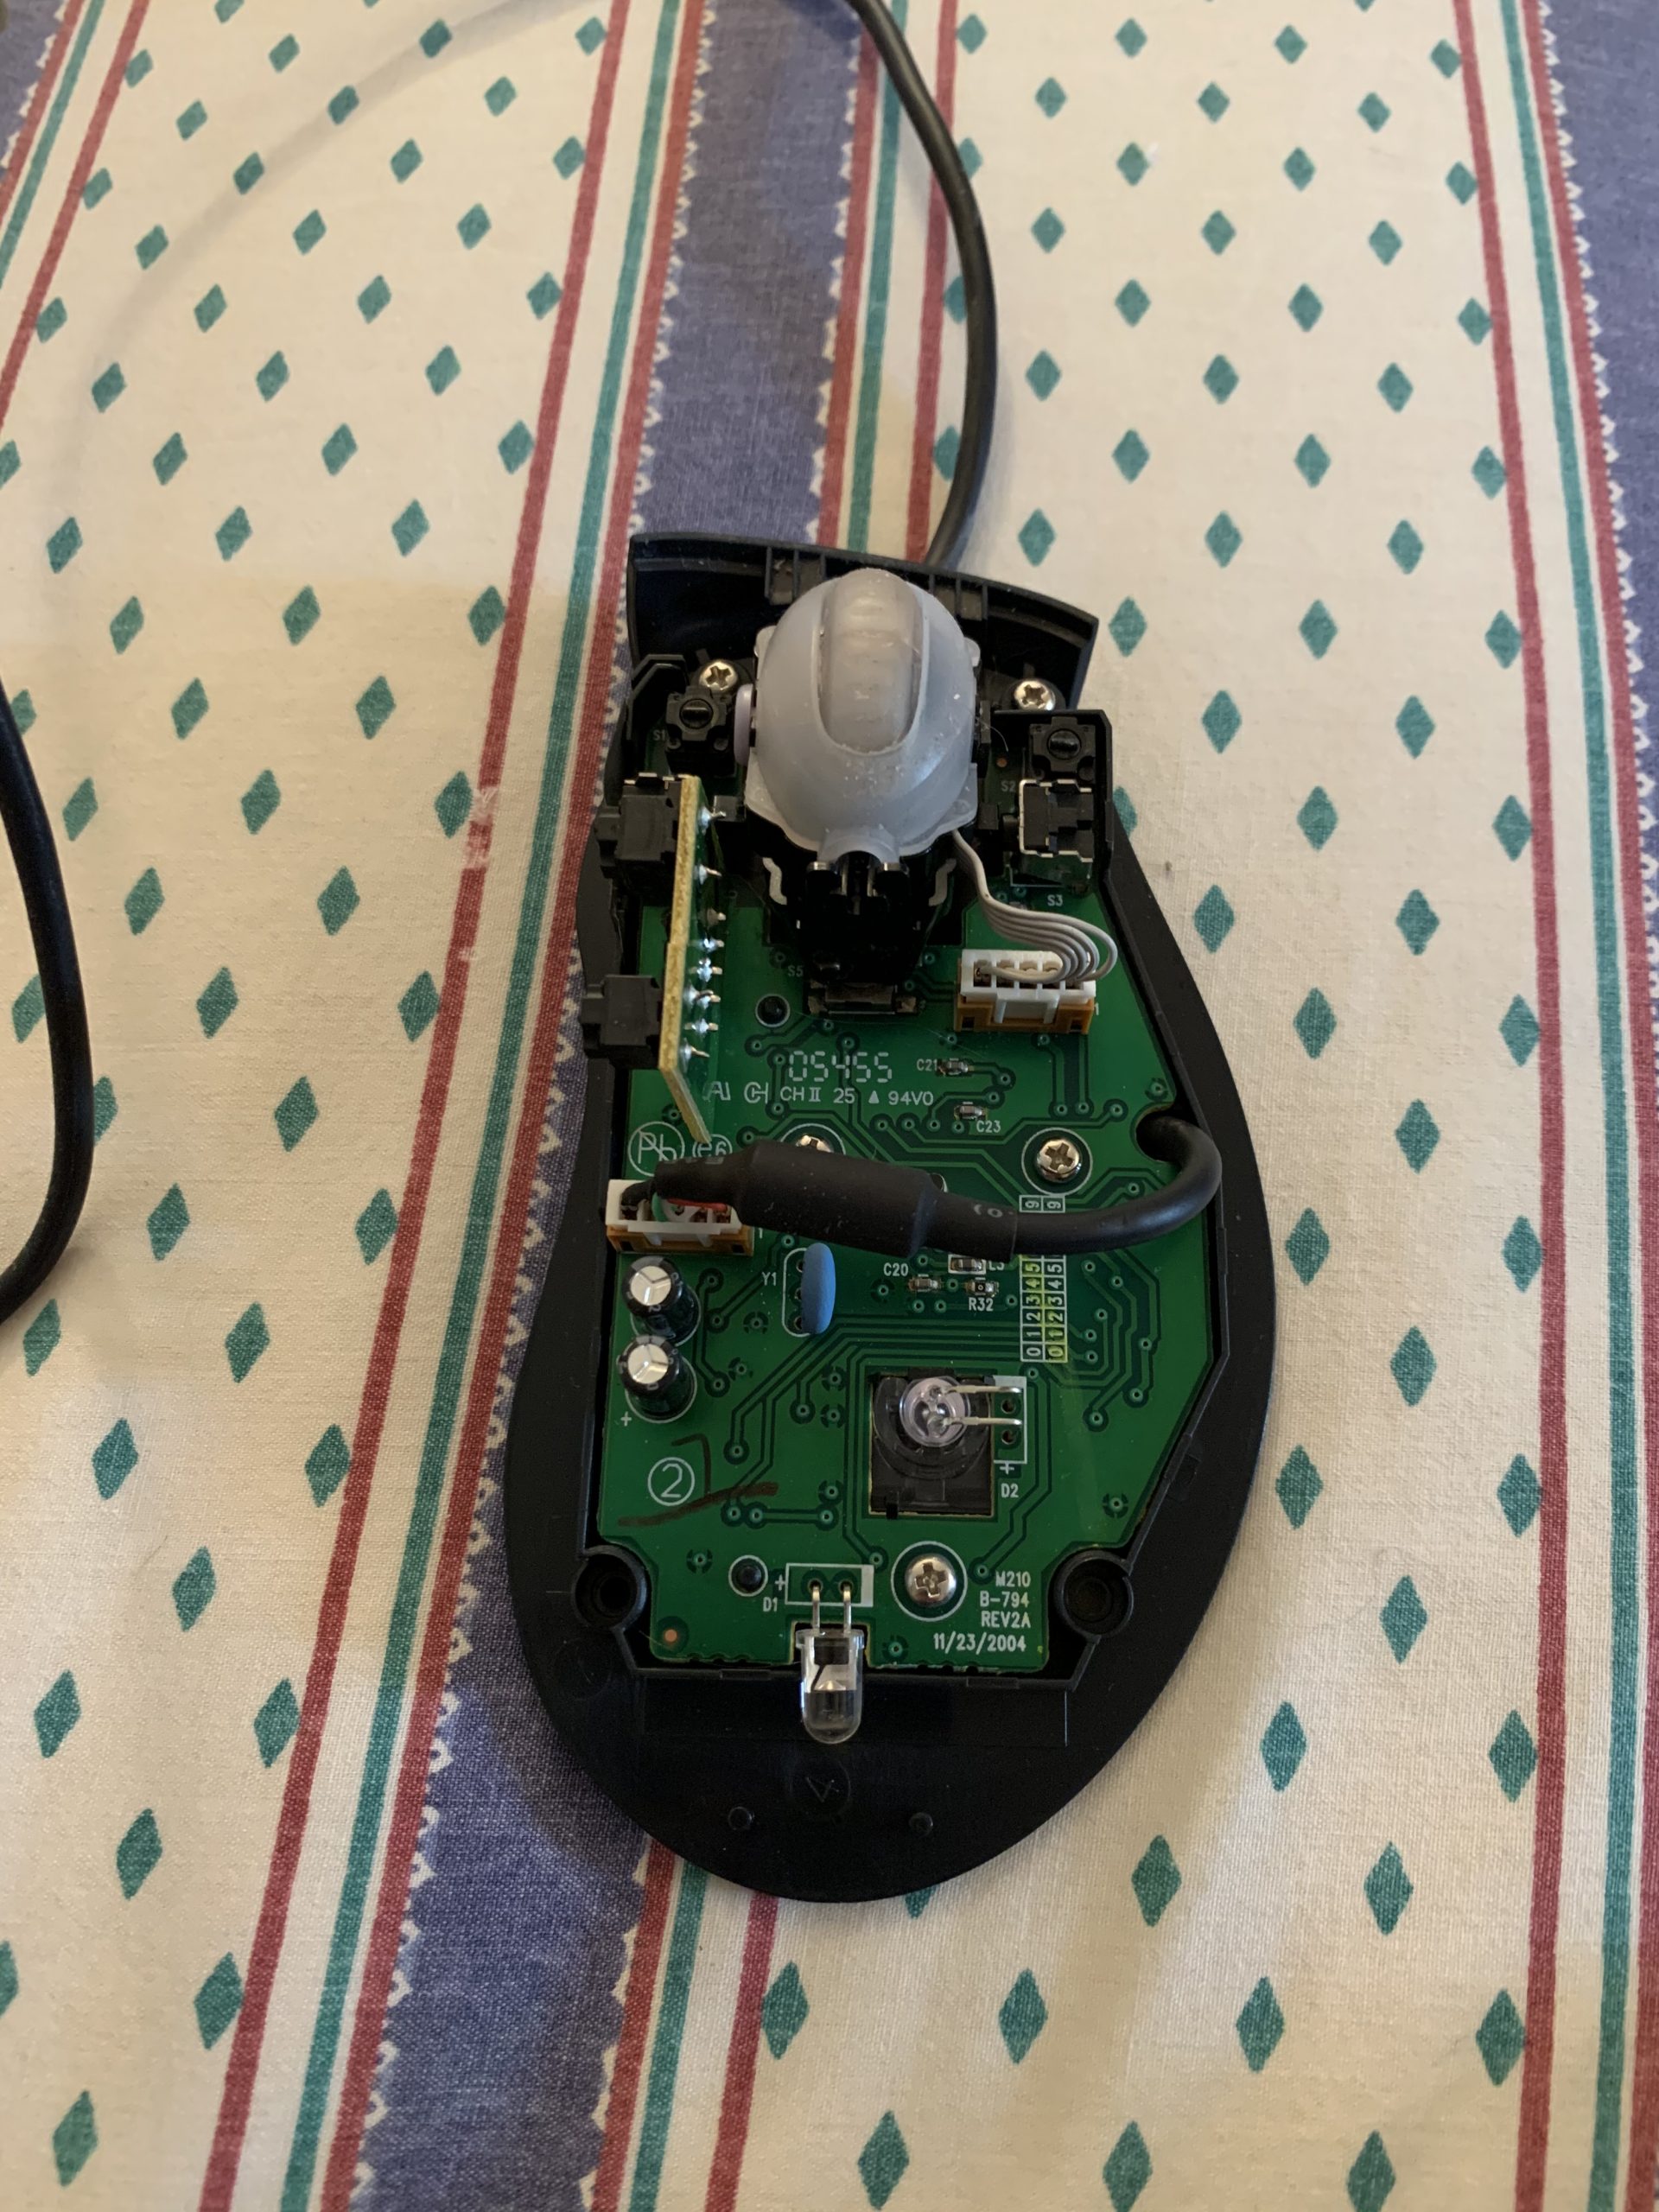
Remove the 3 screws holding the board in place.
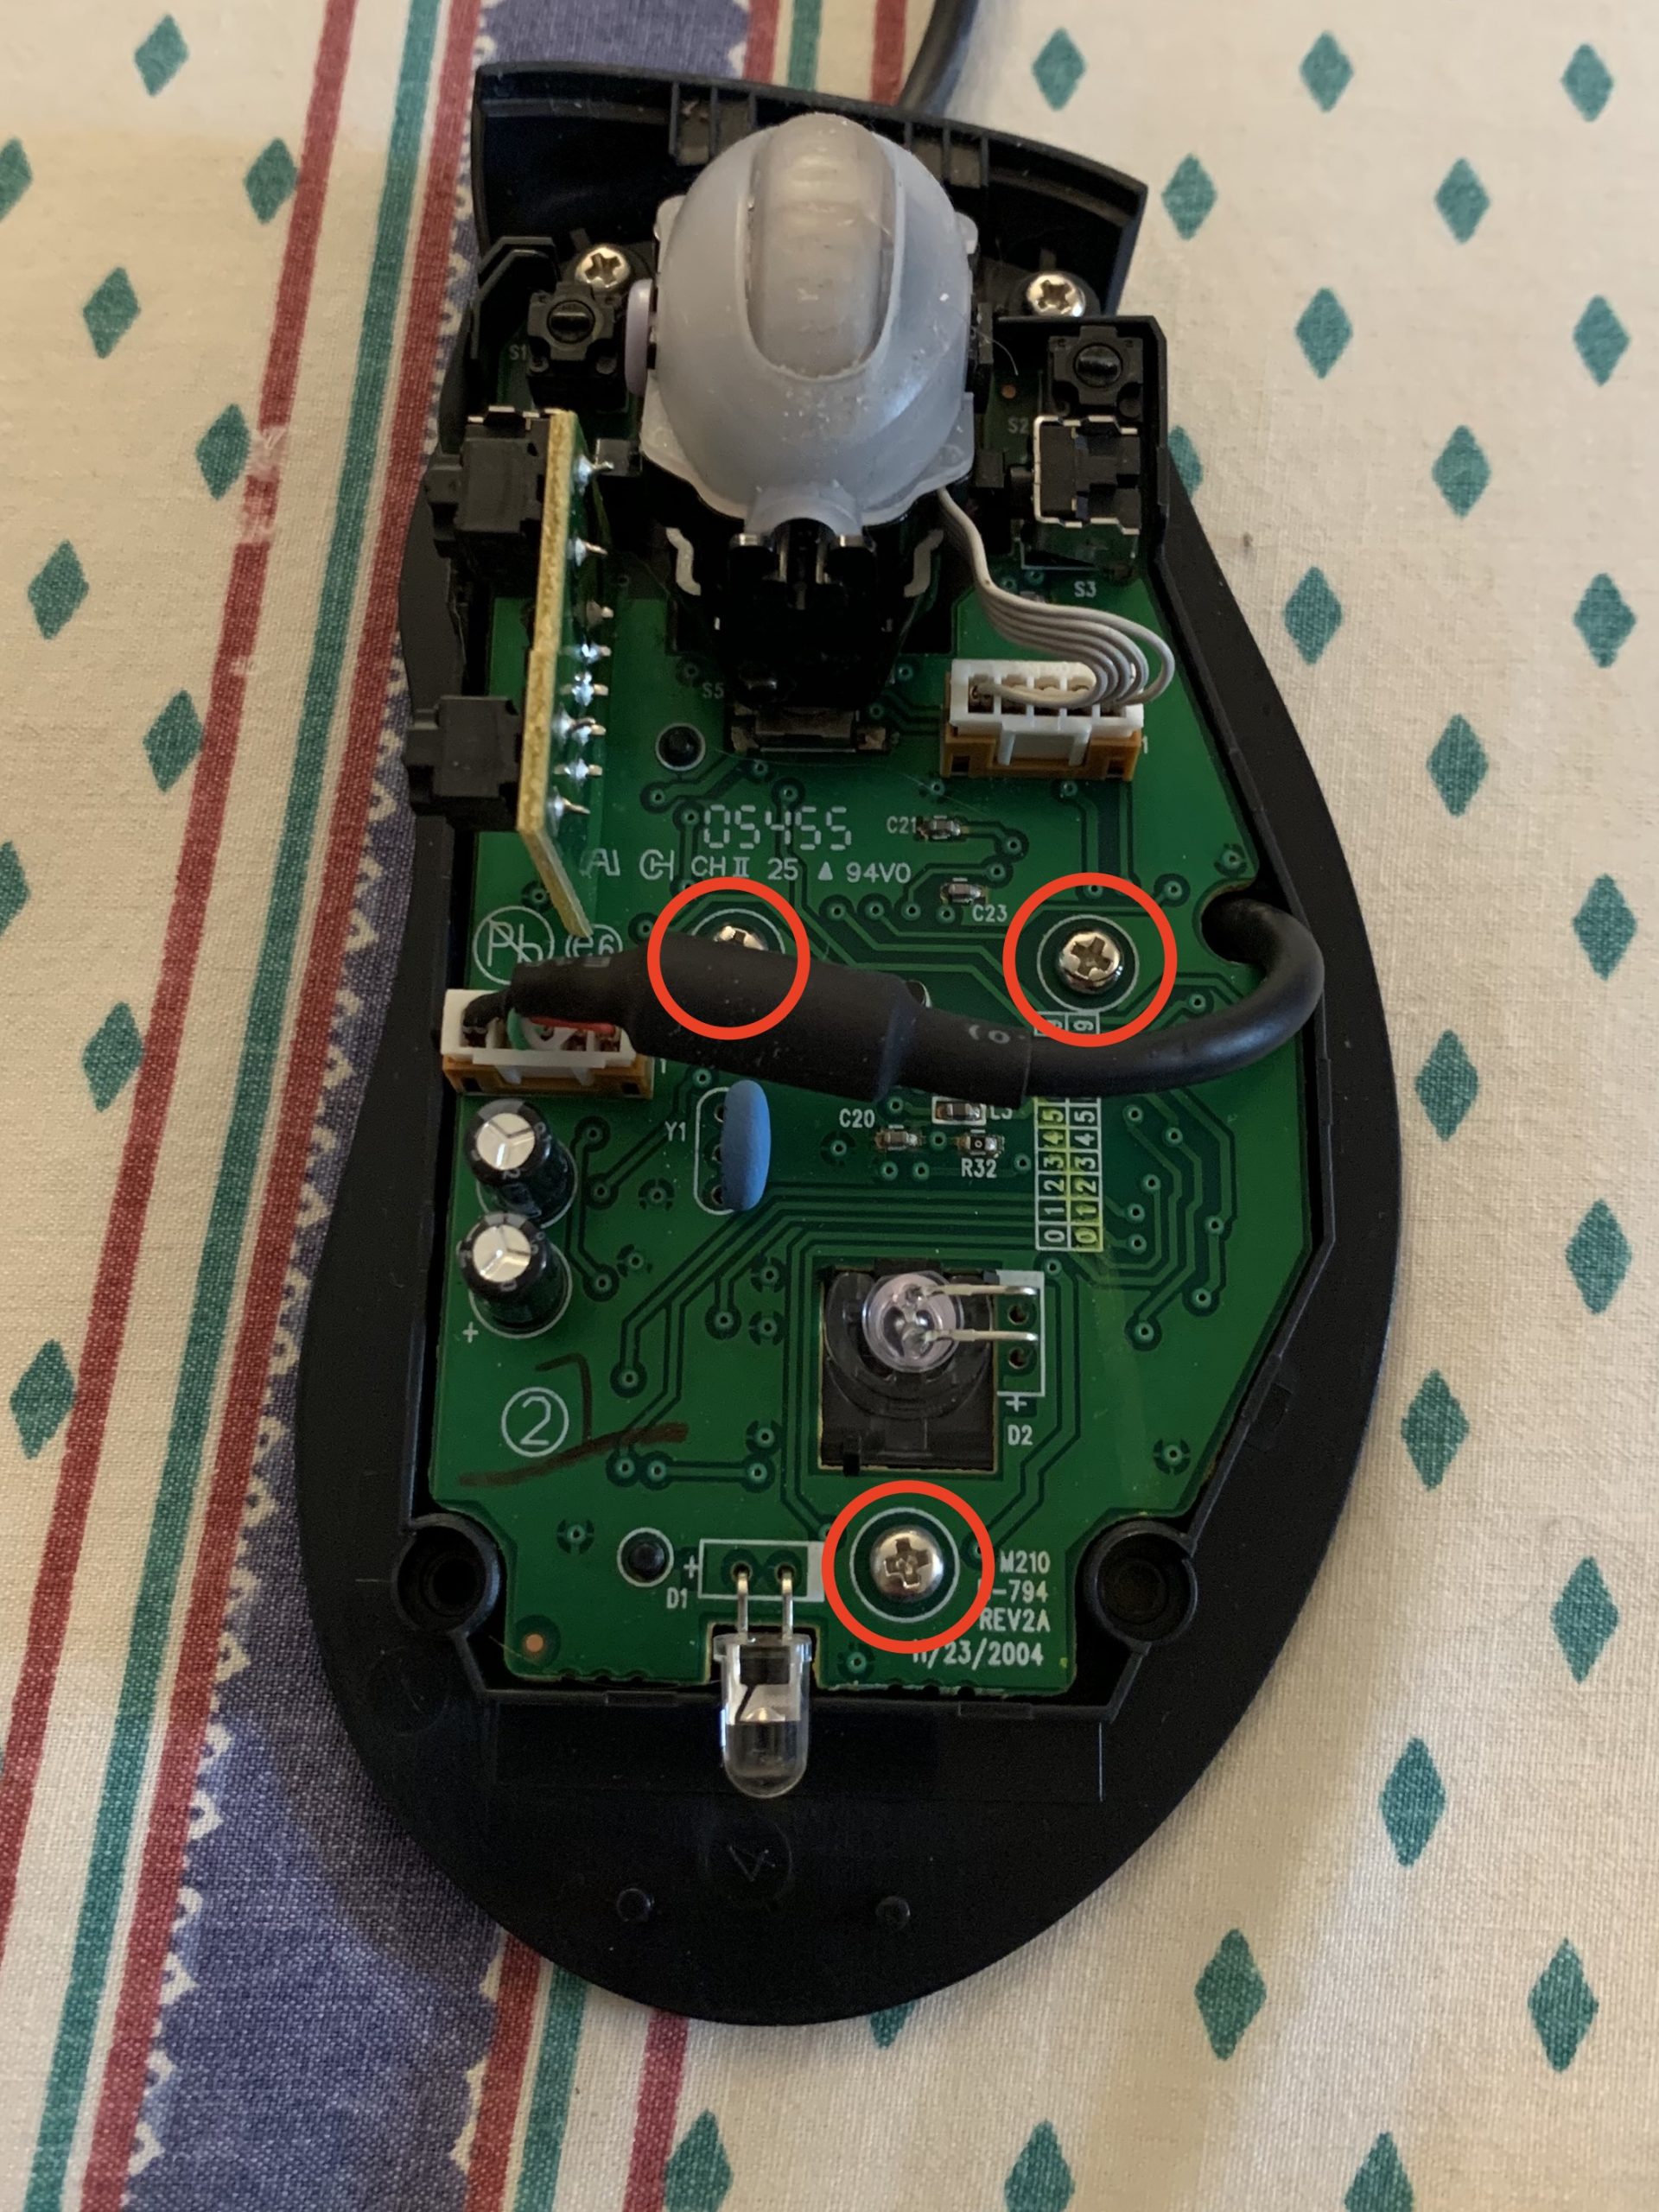
There are two screws at the top of the mouse which I completely fail to understand the purpose of. I don’t think you need to remove them. I did, and then confused myself because I couldn’t figure out what they were even holding in place.
At this point, you should be able to tilt what’s left of the mouse wheel assembly up, and lift the board out. You need to lift the bottom of the board up a bit, because the LED for the optical mouse sensor goes into a housing below.
Now follow the directions as outlined in the YouTube video I linked at the top of this post to swap the tactile switches. I absolutely love this mouse, and I’m excited that I’ve found a way to completely refurbish it with brand new button switches!
Follow the steps in reverse to put the whole thing back together. Like I said earlier, be very careful with the mouse wheel. Make sure it’s oriented completely perfectly when you put it back together.


I’ve now had to do this repair twice. The left button wears out way too quickly on this mouse. I blame Microsoft. It seems as though they used a simple tactile switch on this model rather than a microswitch intended for mice.
The EVQ-P0E07K is rated for 5,000,000 presses, which seems like a lot. I’m pretty sure I haven’t clicked 5,000,000 times before I start running into problems with this mouse. I can’t explain why it fails so quickly…
Just replaced the left tactile switch again. It’s been bothering me for months and it finally got to the point that it was unbearable. It was starting to double-click on its own. So basically, at least for my amount of usage, it only lasts about a year, maybe less.
interesting thanks. I got this issue with the mouse too, button become to die. But this is takes years, even plastic become glossy.
Will report after the replace. maybe alpine switch also will work?
Yeah, I would guess there are a lot of different switch models out there that would work if you can find one that has approximately the same dimensions.
It would be interesting to find something better that is more designed to actually be used in a mouse…
Just got a Microsoft Wireless Mouse 5000 from work, they are mated to the receiver and if someone takes the receiver then the mouse is useless… Well, unless until you open it up and find that it uses the exact same buttons. Going to be harvesting buttons for my Intellimouse!!
Disassembled the MS Wireless Mouse 5000… Salvaged the switches (and some other parts).. Disassembled my Intellemouse, removed both front switches and replaced them with the MS WM 5000 switches. Put everything back together and all is good to go! Thanks for the info!
Glad to hear it worked out well, MC! Thanks for the update!
Just use a caliper to measure the switch dimensions, and note the pin config as well, then head over to digikey or another electronics supply house that has a parametric search.
You might carefully examine how much depth it takes to activate that switch and if the mouse button is pressing it down too hard, trim a little off the plunger piece on the back of the button, OR trim a little off the switch’s plunger though it is probably more fragile and yet, modularly replaceable.
You probably won’t find anything with substantially higher durability in that form factor. Longer life switches like those typically found on logitech mice, use a different form factor instead. They too, eventually wear out but there’s a reason they use the longer bodied switches. Here’s an example of a common one that people put in their logitechs:
https://www.digikey.com/en/products/detail/omron-electronics-inc-emc-div/D2F-01F/83266
Thanks for the advice Dave. Yeah, I think the smaller form factor is going to make it harder to find anything better.
The process you described with measuring the dimensions is how I originally found the Panasonic EVQ-P0E07K. I’m pretty confident it (or something similar by Panasonic) is the original part. It looks exactly the same, has the same distinctive design.
I don’t mind replacing it occasionally. I just replaced the switch again today. It was starting to double-click on its own, and a lot of times would completely ignore my clicking or dragging. It was driving me crazy. So this time it lasted for about 14 months, but realistically probably closer to 12 or 13.
I’ve purchased a bag of Panasonic tactical switches (EVQ-P0E07K). I need to replace the left tactical switch in the mouse approximately every year. Costly to maintain if you have to pay an electronic shop to do the soldering. The initial switch that came w/mine in 2004 lasted almost four years, but these replacement switches only last a year. I’ve been replacing switches since 2021.
My back up mouse, a M$ comfort mouse 6000, also uses these Panasonic switches, but they haven’t failed yet in 11 years of use!
Yeah, something is really strange about how the lifetime of the new switches is so short compared to the original switches in the mouse. It makes me wonder if Panasonic made something custom for Microsoft that had a longer life. I feel pretty confident it’s a Panasonic part based on the markings, but maybe it’s not something you can easily buy online. I dunno!
Just swapped out two switches to resurrect an Intellimouse 4.0 – I needed a wired mouse to troubleshoot some issues I was having. But I lost one of the teflon sliders – must have stuck to something and walked.