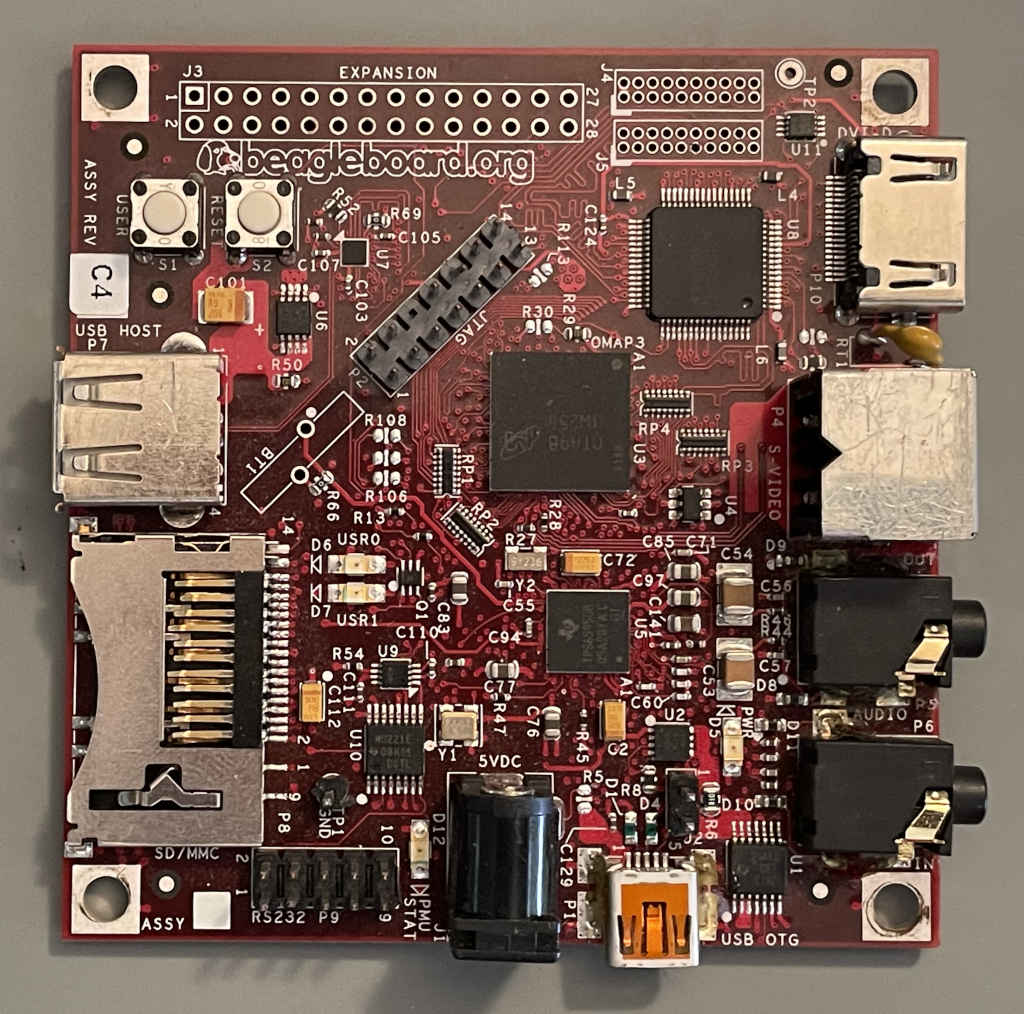
After I figured out the bug with the UART driver, I realized that the OMAP3530 has support for booting from USB, so I decided to go off on a random tangent to get USB boot working. There was no problem I was trying to solve or anything like that. I just thought it would be a fun experiment (am I a masochist?). Little did I know, I would be getting myself into some tricky USB packet analysis.
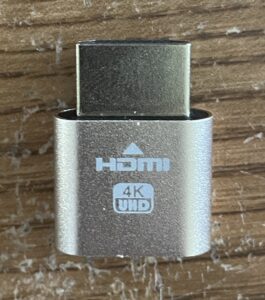
I recently found myself needing to change the monitor that a cheap HDMI “dummy plug” pretended to be. It was a random one I had bought on Amazon several years ago that acted as a 4K monitor, and I needed it to be something simpler that didn’t support a 4K resolution. The story behind why is a long one that I’m still figuring out and might eventually become a separate blog post in the future.
If you’re not familiar with dummy plugs, here’s a quick primer: they are tiny dongles you can plug into an HDMI, DVI, etc. port that don’t actually do anything with the video signal. They simply have the minimum circuitry needed for a video source device, like a computer, to think that a monitor is hooked up. In general this entails a pull-up resistor on pin 19 (HPD) to +5V, as well as a little I2C EEPROM chip containing the Extended Display Identification Data (EDID). This is useful for headless machines to force the OS to think a monitor is attached.
The EDID contains all the info about the monitor: the manufacturer, manufacture date, supported resolutions, audio channels, color space, and stuff like that. My goal was to replace the dummy plug’s EDID with an identical copy of an EDID from one of my many 1080p HDMI capture devices. Then, the computer I plugged it into would think the capture device was plugged in instead of a 4K monitor, and everything would be hunky dory.
This is the final post in my blog series about getting my Chumby 8 from 2011 working on a modern 6.x Linux kernel, as opposed to the stock 2.6.28 kernel it came with. Here are links to all of the previous articles where I went into detail about the various obstacles I had to overcome: 1, 2, 3, 4, 5, 6, 7, 8, 9, 10, 11, and 12. I guess we’ll finish it off with lucky number 13.
It has been over two years since that fateful day when I started trying to get a newer U-Boot working on my Chumby to kick off this whole process! I haven’t been working nonstop on the Chumby this whole time though. I completed most of my work on this project by early 2023, and since then I’ve just been trying to catch up on writing these posts and also fixing little issues as they’ve come up. It’ll probably never be fully completed though. I will likely run into various problems in the future as new kernel versions come out and things inevitably break.
I’m not going to cover U-Boot as part of this. If you’re curious about that, check out the first post in the series. Most of the work I did was in Linux. Let’s start by looking at everything I accomplished in the kernel, grouped by subsystem. We’ll see the commits that are in the mainline kernel versus the commits that I haven’t submitted upstream for whatever reason. I’m also linking to all of the original patches on lore.kernel.org in case you want to see the related code review and discussion.
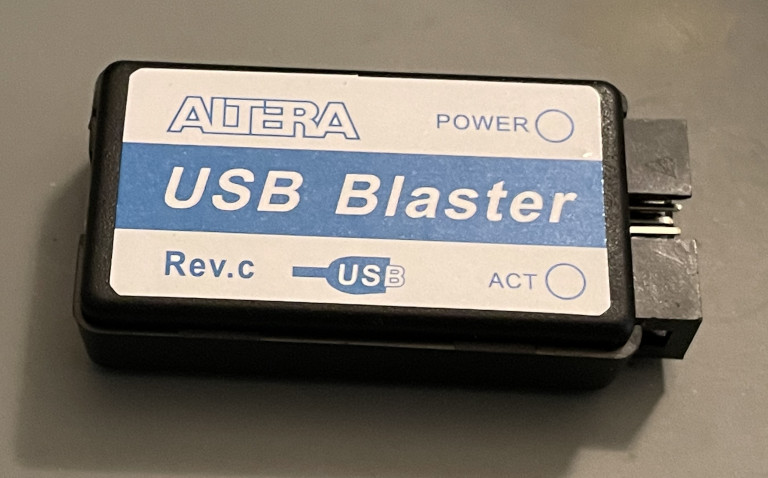
As you may remember from my last post on the subject, I fixed a couple of cheap Altera USB Blaster clones in June. I found improved open-source firmware and ported it to the previously useless CH552G-based one while fixing a bug in the process, and I soldered a slower 12 MHz oscillator into the Waveshare FT245+CPLD blaster which magically made it start working reliably in Linux.
Because I don’t know how to let things go, not to mention I find this topic interesting to write about, I bought some more cheap USB Blaster clones on AliExpress. The cheaper one ($2.45) ended up being another CH552G-based one identical to the previous one I got on Amazon, right down to the Windows BSOD problem with the stock firmware. That problem is now easy to fix by reflashing it with the open-source firmware I ported.
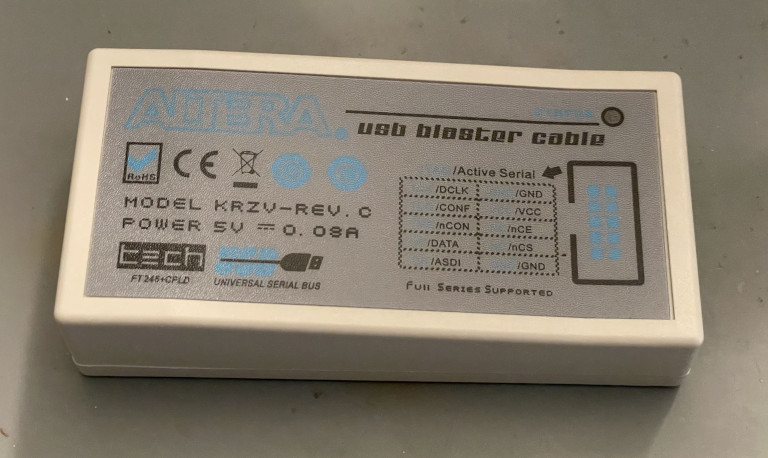
The slightly more expensive device ($9.34) was an FTDI+CPLD design with a completely different PCB and enclosure from the Waveshare one. The label on the front says it’s a model KRZV-REV. C. It still uses an Intel/Altera EPM3064ATC44-10 CPLD, exactly like the Waveshare. The pin mapping on the CPLD isn’t the same though.
It had pretty much the same problem the Waveshare model had, though: it worked fine in Windows, but in Linux it gave me random results. It mostly didn’t work at all. I could occasionally get it to do something successfully if I tried enough times. Also, it would fail Quartus Programmer’s JTAG Chain Debugger tests, just like the Waveshare, with “Uncertain JTAG chain” warnings.
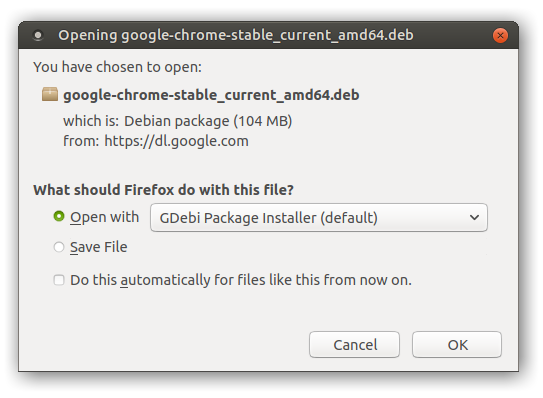
Sometime back in 2018, I tried out a fresh install of Ubuntu MATE 18.04 on one of my computers and noticed a strange problem when I attempted to install Google Chrome. I clicked the little Firefox icon in the top panel:
Then I downloaded the latest Chrome .deb from Google and opened it up from inside of Firefox:
At this point, GDebi popped up giving me the option to install it. Everything seemed totally normal so far.
Way back in part 2 of this series, I first got my Chumby 8 booting into a newer Linux kernel. (Here are links to parts 1, 2, 3, 4, 5, 6, 7, 8, 9, 10, and 11 if you want to read the rest of the saga). At that point early on in the project, I had to get the UART driver working. I didn’t spend much time talking about the UART in that post, but it actually gave me a small challenge that I recently had to revisit. I thought it would be fun to tell the full story of the UART struggles I ran into.
When I was first figuring out how to configure my new kernel, I noticed that the pxa168.dtsi file included in the mainline kernel already had the UARTs added. They each had two compatible strings, in order of priority: mrvl,mmp-uart and intel,xscale-uart. This makes sense because Intel’s XScale architecture was used for many things including the PXA series. Then the PXA series was sold to Marvell in 2006, who later designed the PXA16x processor used in the Chumby 8.
Searching through the kernel sources, there were actually three drivers that reference the mrvl,mmp-uart compatible string: 8250_pxa, 8250_of, and the deprecated pxa driver. I originally tried out 8250_pxa, but I ran into a problem with it. During large transmits, for example when typing “dmesg” after the kernel booted, it would drop a ton of characters. Here’s a small excerpt of a modern recreation of the issue in a newer kernel:
This weekend I tinkered with my ancient Raspberry Pi. It’s the original Model B from 2012 that only has 256 MB of RAM. I bought it in July of 2012 for $35, and then a few months later they started being manufactured with 512 MB instead. I wish I had waited a little longer to buy mine!
I’ve played around with it a little bit off and on over the years, like when I was working on some improvements for RPiPlay. But for the most part it just sits around doing nothing. I was inspired when I heard about someone who was recently having trouble playing video on their Model B+ 1.2.
They reported that while attempting to play a 1080p H.264 video file in VLC on the Pi, it would only play at about 3 frames per second, despite lots of Google searching and OS reinstalls. I had dealt a little bit with H.264 when I was playing with RPiPlay, so I was kind of familiar with the situation. I went ahead and imaged an SD card with the latest Raspberry Pi OS compatible with this model. According to the Raspberry Pi website, as of this writing the latest version is Raspberry Pi OS 32-bit from March 15th, 2024 with Debian bookworm and Linux kernel 6.6. I opted for the “with desktop” version so it would boot into a full-fledged OS so I could try VLC and other options.
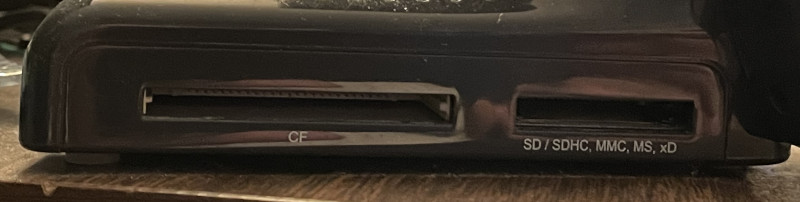
As my Chumby 8 kernel upgrade project neared the finish line (read parts 1, 2, 3, 4, 5, 6, 7, 8, 9, and 10 first if you want), I noticed something subtly annoying. The built-in SD/CF card reader was allocating its own dummy block device (/dev/sda) even if no cards were inserted.
scsi 0:0:0:0: Direct-Access Multi Flash Reader 1.00 PQ: 0 ANSI: 0
sd 0:0:0:0: [sda] Media removed, stopped polling
sd 0:0:0:0: [sda] Attached SCSI removable disk

# ls /sys/class/block/
mmcblk0    mmcblk0p1  mmcblk0p2  mmcblk0p3  sda
This may seem nitpicky, but I really didn’t want that empty sda device hanging around. Apparently neither did the original Chumby team, because the old 2.6.28 kernel had a workaround to avoid it. Let’s look at the relevant portion of the schematics. There are two sockets, and the SD/MMC/MS/xD socket has a bunch of pins for different card types, so the card reader takes up two whole pages. Let’s focus on just the SD/MMC pins. You can imagine that the CF/MS/xD sections look very similar:
What follows is the story of how I fixed not one, but two, different flawed Altera USB Blaster clone devices that never worked correctly after I bought them.
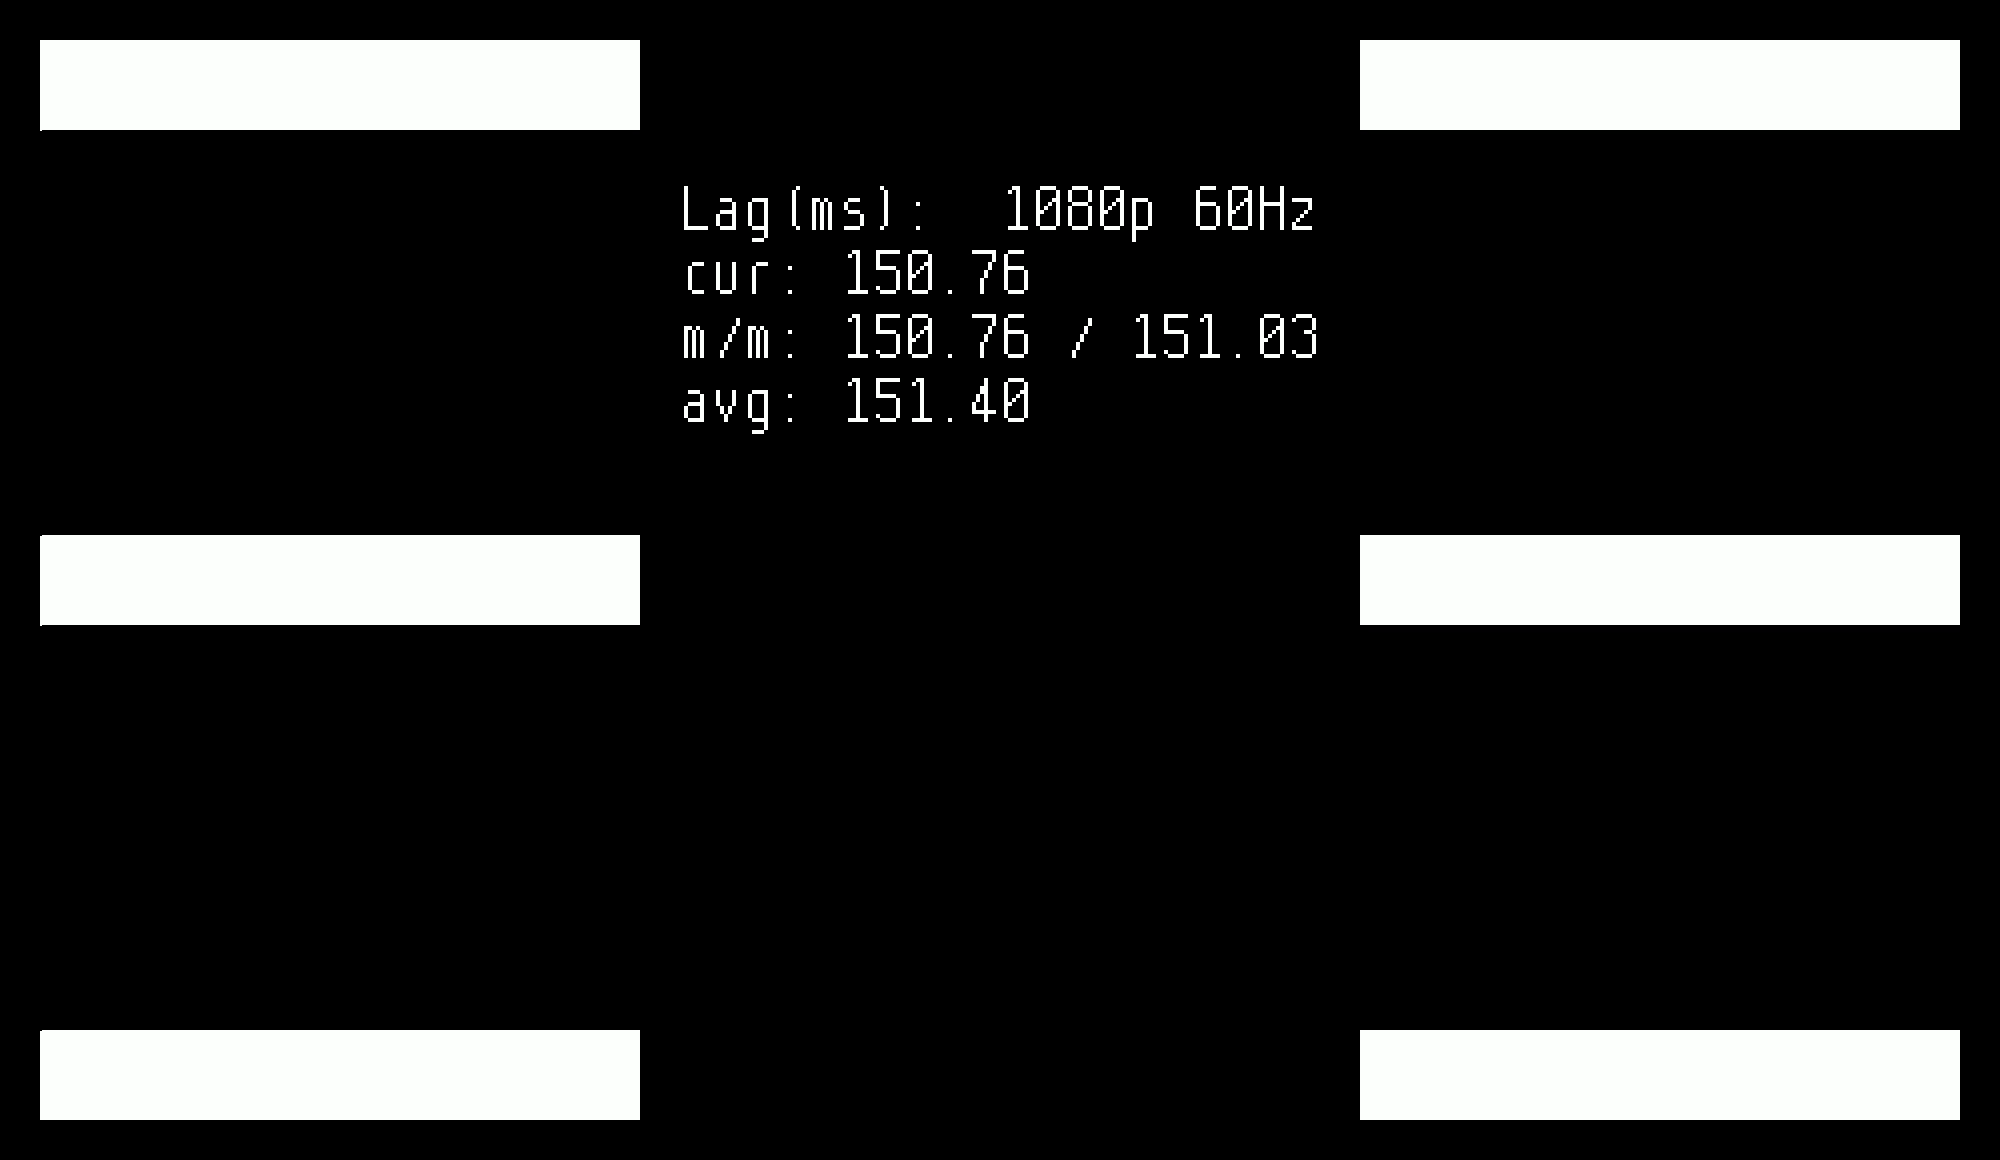
I recently built a few Time Sleuths for HDMI input lag testing. Time Sleuth is a neat little open-source project that allows you to measure the time it takes for your TV or monitor to display an image. The way it works is an Altera/Intel MAX 10 FPGA creates a video signal that is mostly a black screen with some blinking white boxes. It feeds the image off to a TI TFP410 DVI transmitter, and also looks for a pulse on a photodetector. It measures the difference in time between when the white box blinked on and the photodetector saw it, and displays it as a number on its generated video signal with some min/max/average stats. Pretty cool! If you’re not into soldering, you can also buy them fully assembled.
I’m going to start this post off with the obligatory list of links to the previous parts in the series if you’re new here and are interested in seeing the full story: 1, 2, 3, 4, 5, 6, 7, 8, and 9. This is the tale of how I upgraded my Chumby 8 to run a modern Linux kernel.
I only had some minor things on my list to figure out before I could call my kernel upgrade good enough to be finished. The most important remaining thing was the real-time clock, or RTC. I noticed that whenever I rebooted the Chumby, it always started out with the date set to the Unix epoch in 1970:
Would it really be this simple? Did I just need to enable the RTC in my device tree file, make sure the kernel driver was enabled, and then be done with it? I had already experienced similar success with other PXA168 peripherals. So I tried it out.