I’m no stranger to pushing hardware past its limits. For example, seven years ago, I tracked down an issue that prevented 16 GB of RAM being used in a motherboard that only supported 8. It ended up being a one-line GRUB hack to fix one of the ACPI tables that was mistakenly overlapping a PCI memory region with the RAM region and causing Windows to bluescreen.
Around the same timeframe, I began cobbling together another computer using a motherboard from an eMachines EL1200. The EL1200 was a cheap machine that came out in 2008. I found the motherboard on eBay for next to nothing, and it was also easy to find an Athlon X2 4850e to go with it. This particular motherboard only officially supports 2 GB of RAM in each of its two slots for a total of 4 GB, but I knew that 4 GB DDR2 sticks existed, so I went ahead and tried to put 8 GB in it. Why not? They were easy to find and inexpensive.
The 8 GB of RAM worked perfectly fine and I was able to boot into Linux. This honestly didn’t surprise me too much. I ran memory tests and they all came back perfect. The computer worked great with 8 GB of RAM.
Then, I tried to enter the BIOS setup by pressing F2 at startup when the eMachines splash screen came up:

The screen went black, and then just sat there with a flashing white cursor in the upper-left corner. I wasn’t able to break it out of this hang with any special keystrokes. It was completely frozen. I could only get past it by rebooting. I figured that the only weird thing I had done was go past the maximum RAM requirements, so I tried putting in two 2 GB sticks instead. With only 4 GB of RAM installed, I was able to get into the Phoenix Award BIOS with no trouble.
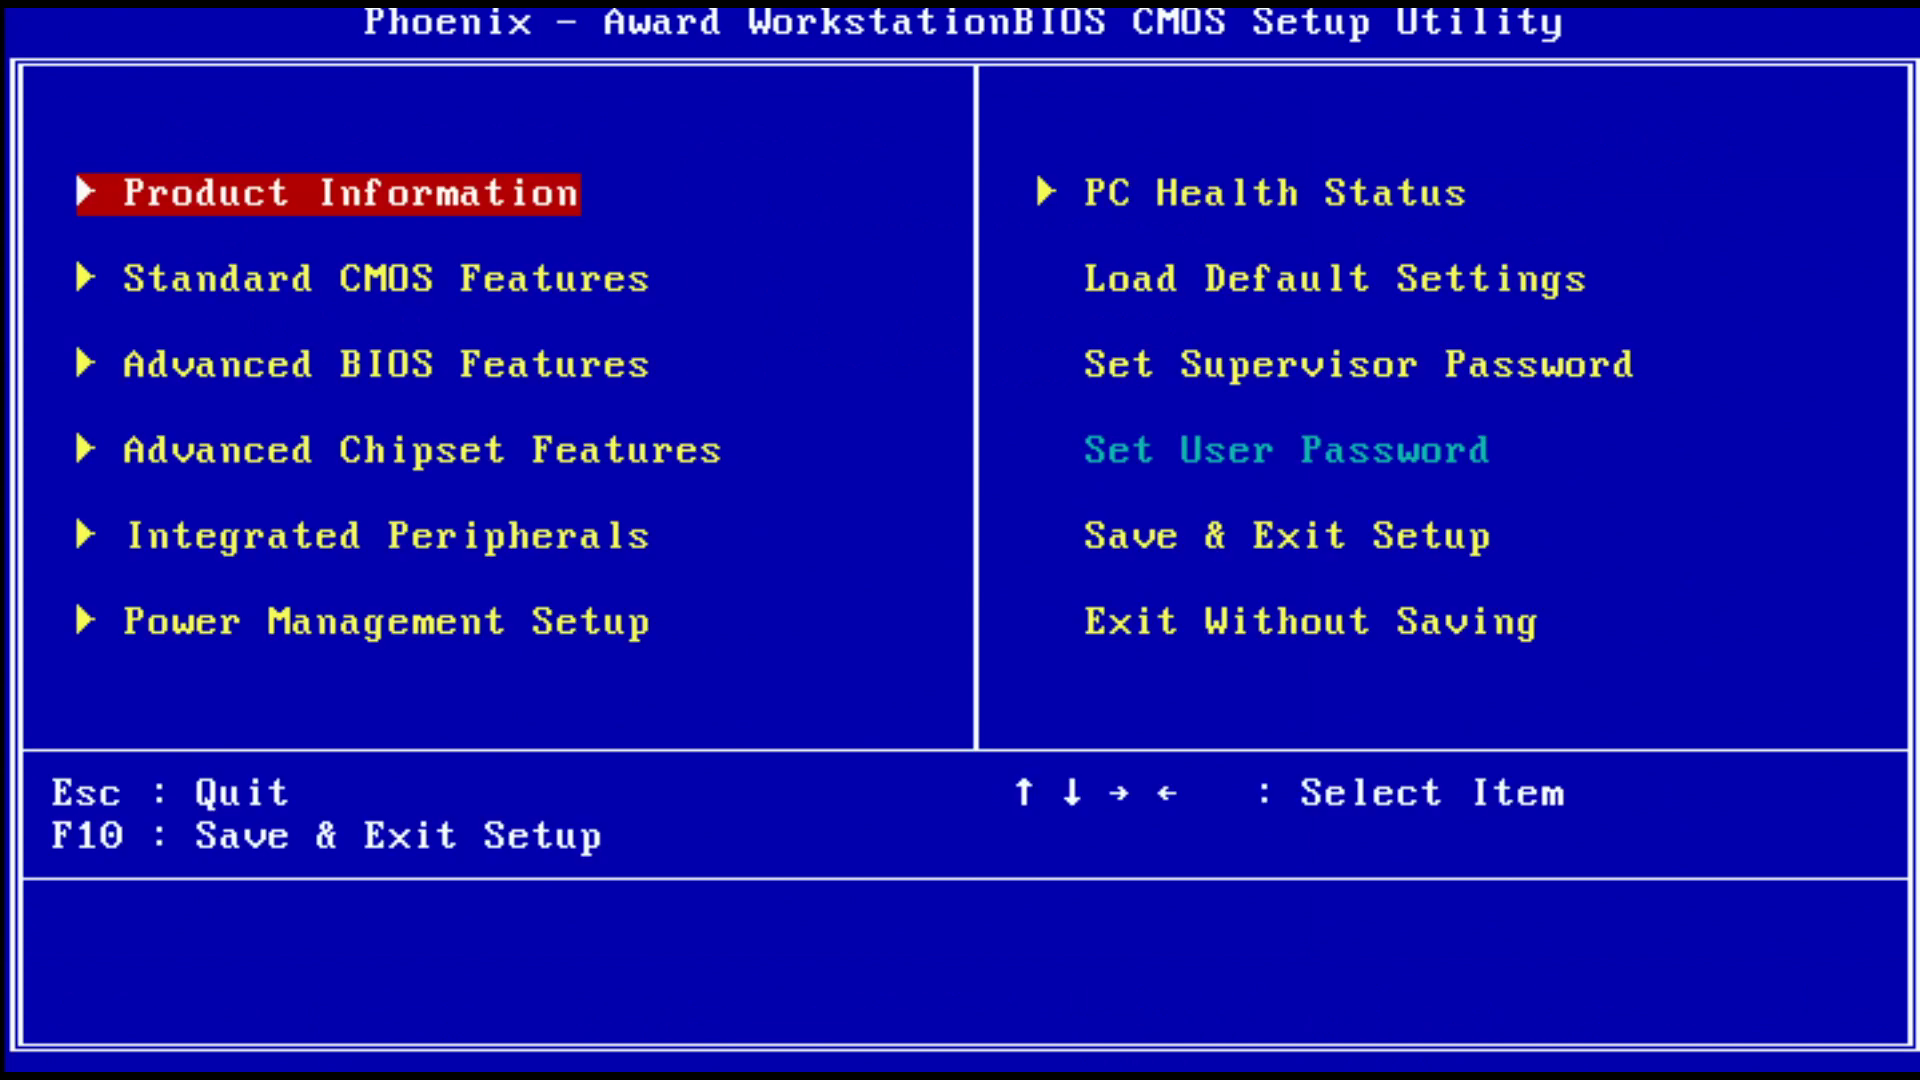
Very interesting! So the motherboard pretty much worked fine with 8 GB of RAM, but something caused it to fail to enter the BIOS with that much memory installed.
I tried a few different BIOS updates I found online for this motherboard. None of them would allow me to enter the setup with 8 GB of RAM installed. I left it alone for a while, and then on a whim I thought I’d try some BIOS hacking. I used CBROM32 to integrate a newer AGESA that I extracted from a different motherboard’s BIOS. My hypothesis was maybe the AGESA in my BIOS was too old. Long story short, I somehow successfully managed to integrate the newer AGESA without bricking the board, but it didn’t change the 8 GB behavior at all.
That’s where I left this project in 2021. It’s been one of those things on my list of “hey, that would be cool to look into” ideas, but I just couldn’t bring myself to go into a crazy in-depth investigation to track down this particular bug. The older I get, the more exhausting it is to spend hours staring at assembly code. It’s hard on the eyes. Also, maybe I would have been more motivated to tinker with it if the motherboard had a socketed ROM chip I could easily swap in and out, but this one doesn’t. It’s a SOIC chip soldered on.
Fast forward to 2026. Agentic AI is moving forward at a blazing fast pace. I’ve had some success with fixing bugs and reverse-engineering things with Claude Code, so I thought this would be a great task to try throwing at it. Can Claude fix a BIOS bug?
I started with this prompt to Opus 5:
The .bin file is a BIOS dump from an eMachines EL1200. It officially supports 4 GB of RAM, but I put 8 in it and it still boots fine with 8. But…if I try to go into the BIOS setup it hangs unless I drop it back down to 4. Can you figure out why the BIOS setup hangs with 8 GB of RAM? It should be possible to fix.
A little over a half hour later, Claude spit back to me a write-up about the issue along with a patched BIOS image to try. It also corrected me by letting me know that the BIOS would still hang like this even if there was only a single 4 GB stick in it. The only working 4 GB configuration was two separate 2 GB sticks. I tested with a single 4 GB module and verified that it was totally right.
I flashed it to the machine with flashrom:
$ sudo flashrom --programmer internal -w /tmp/newbios.bin
flashrom v0.9.9-r1954 on Linux 5.4.0-42-generic (x86_64)
flashrom is free software, get the source code at https://flashrom.org

Calibrating delay loop... OK.
DMI table is broken (bogus header)!
Found chipset "NVIDIA MCP61".
Enabling flash write... OK.
Found Macronix flash chip "MX25L8005/MX25L8006E/MX25L8008E/MX25V8005" (1024 kB, SPI) mapped at physical address 0x00000000fff00000.
Reading old flash chip contents... done.
Erasing and writing flash chip... Erase/write done.
Verifying flash... VERIFIED.
I rebooted, and…the new BIOS spit out by Claude completely bricked it. The CPU fan would turn on and then nothing. No monitor signal or anything.
Sweet. Was this whole experiment worthless? I can imagine the blog post title now. “Claude turned my computer into a fancy paperweight.” Did I just prove that AI is garbage? Not really. It’s all part of how AI is best used for tasks: give it a feedback loop and let it iterate. I told it what happened, and 6 minutes later it realized the mistake: it had shifted the location of a few modules (MEMINIT.BIN, HT.DLL, HT32GATE.BIN) that aren’t supposed to be moved around on the flash chip, at least not without updating some pointers. When it was patching the bug, it didn’t re-compress the section it patched; it just shifted everything after it out of the way to make room for an uncompressed version instead. This was what completely broke it.
It offered to figure out how to compress the patched section and ensure those other modules wouldn’t be shifted around. I told it to go for it. 10 minutes later, it had written its own LH5 compressor and spit out a new BIOS image to test.
This time around, I asked it to do more review and testing of its work, because I knew it would be difficult to keep recovering the BIOS after a brick. It didn’t find anything wrong during review, but the process it followed was kind of fun to follow along with. It wrote a very simple x86 interpreter in Python, tested the routine that it patched to make sure it no longer crashed with 8 GB of RAM, and then tested its new compressed module against the BIOS’s own decompressor code to make sure it was compatible. With that, I was ready for a re-test.
First, I had to unbrick the motherboard. That ended up being a little more difficult than I had hoped, but it was manageable. Unlike my last experiment with flashing a BIOS using a SOIC clip, this one didn’t work with the chip mounted directly on the board. My trusty CH341A programmer just wouldn’t detect the chip. It also kept cutting out and disconnecting and reconnecting. It was acting like it was being asked to supply too much current.
I ended up having to lift the flash chip’s VCC pin from the motherboard while heating it with my soldering iron. Then I stuck a piece of Kapton tape underneath to isolate it from the board. This is something you have to do occasionally if a motherboard doesn’t have something like a diode or transistor isolating the chip from its power rail. With that little tweak in place, the CH341A programmer recognized the chip and was able to flash it. I also could have just removed the entire chip with hot air instead, but it was really close to a bunch of plastic like the battery holder and a SATA connector.
Anyway, I reflashed it with my original BIOS backup (to guarantee I would unbrick the computer), soldered the pin back down, booted it up successfully, and then flashed Claude’s second attempt to the board using flashrom.
After rebooting, it came up with the splash screen, so that was good news. I pressed F2 to enter Setup. And…it worked! I was able to see my 8 GB of RAM reported in the Standard CMOS Features subpage.
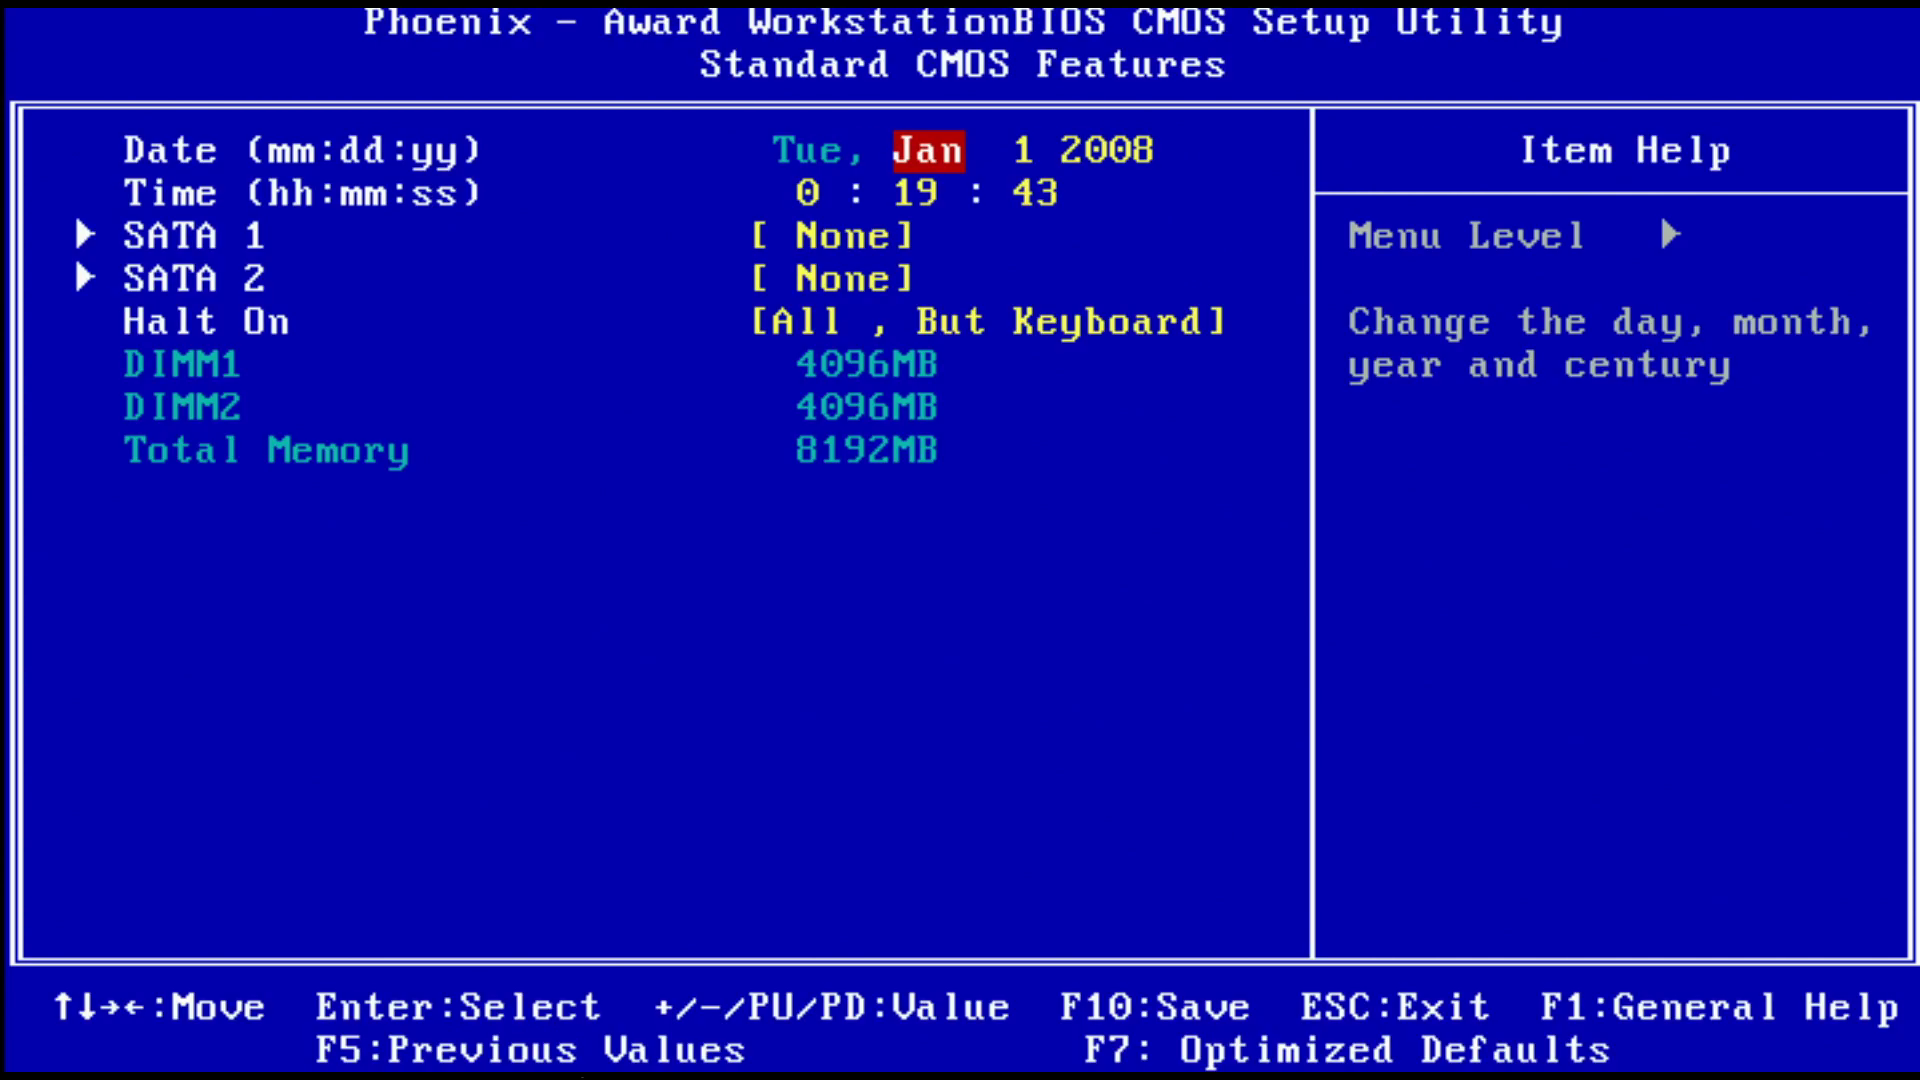
Claude successfully found and fixed the BIOS bug that had been crawling around in the back of my mind, occasionally bothering me for 7 years. With very little input from me, I might add.
You might be wondering: what was the bug that it found, anyway?
The problem was in a small chunk of code in awardext.rom that is used for displaying the amount of memory on the Standard CMOS Features page depicted above:
DIMM1                   4096MB
DIMM2                   4096MB
Total Memory            8192MB
The function’s purpose is to take the number of megabytes of RAM in each slot, and convert it to text drawn on the screen. Converting a number to text is a simple algorithm, which entails repeatedly dividing by 10 and looking at the remainder each time to determine digits to draw from right to left.
The DIMM1 and DIMM2 lines were using an 8-bit divide instruction, which takes a value in the 16-bit register AX, divides it by an 8-bit value in another register, and puts the resulting quotient and remainder into AX’s 8-bit halves AL and AH, respectively. This means the quotient needs to fit inside of 8 bits. The first divide to get the last digit, if you have a 2 GB stick installed, is 2048/10 = quotient 204, remainder 8. 204 fits in 8 bits, so there’s no problem. On the other hand, if you have a 4 GB stick installed, it’s 4096/10 = quotient 409, remainder 6. 409 doesn’t fit in 8 bits. Here is some documentation about the DIV instruction, explaining that a #DE exception occurs if the quotient is too large to fit in the destination register. That’s what Claude correctly guessed was happening.
Astute readers may be thinking: but even with 2 GB sticks, the Total Memory line would be affected! The total is 4 GB! But nope, the Total Memory line was already using a 16-bit divide instruction that was immune to this problem. Claude’s fix was simply to patch the calculations for DIMM1 and DIMM2 to use the same 16-bit divide, being as clever and compact as possible so that it could be crammed into the same routine without shifting everything around to make room for it.
So yeah, that’s the bug. I expected it to be something much deeper, but it was simple. An exception caused by a number-to-string conversion that wasn’t expected to handle large numbers. Interestingly enough, the main page doesn’t show the RAM totals at all, so it must have been arranging the text strings even before entering the Standard CMOS Features subpage.
Some research reveals that it’s fairly common in the BIOS modding community to make patches to the awardext.rom module, although most of the Google results I found were for fixing a 64 GB hard drive size limit. It wouldn’t surprise me if one of the experts out there already knows all about this RAM bug. Nothing obvious showed up for me during searches about this bug.
Does this actually count as a project accomplished by me? Not really. I only gave it some simple guidance and tested what it told me to test. But regardless, this result is absolutely incredible and worth a writeup to tell the story. It fixed a freaking BIOS for me! It knew exactly where to look for the bug, found it, and patched it. It almost worked on the first try, but it made a very silly mistake that was correctable. In hindsight, the bug was very simple, but it still probably would have taken me weeks to figure out. It diagnosed the problem in a matter of minutes. Yes, it took longer than that because I had to be a human feedback loop, and it screwed something up the first time, but isn’t this amazing regardless? I am confident I never would have found the time to look into this myself. Too many project ideas, not enough time, and it’s so low on the priority list.
I’m well aware that a faction of my readership will be upset about this post. How many gallons of water did I waste performing this experiment on what is essentially a scrap computer by today’s standards? Have I sold out to our new AI overlords? Not entirely. I wrote this entire post by hand using my own brain, as always. But I also believe that it’s important to open your mind, experiment, push the limits, and find out what is possible with new technologies. My takeaway from all of this is that debugging and reverse engineering has never been so easily accessible as it is today. That’s kind of terrifying, but also pretty cool.


no comments